All posts by Jackie E-S

Jackie E-S is the owner of HeartStrings FiberArts, a showcase for her growing roster of original pattern designs. As a certified master knitter and teacher, Jackie continues to share her love of knitting and knowledge through design and publication of skill-building pattern instructions, and conducting workshops, programs and demonstrations. Her interest in the fiber arts extends beyond knitting and spinning to include weaving, dyeing and all needle arts. She also enjoys contract bridge and music.

Repairing a hand-knit sock with a knit-in-place patch

Counteracting a throw-away society

Considering the time and expense of making hand-knit socks, it is well worth the effort to repair them if you eventually wear through a hole. You say you don’t know how to darn a sock? Let me help with these photos and brief explanation of steps for the method I use to to repair a sock with a knit-in-place patch.

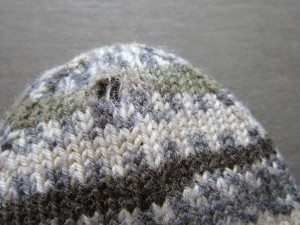
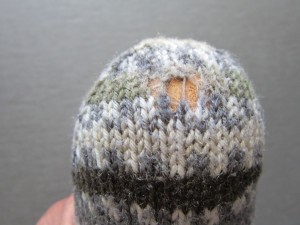
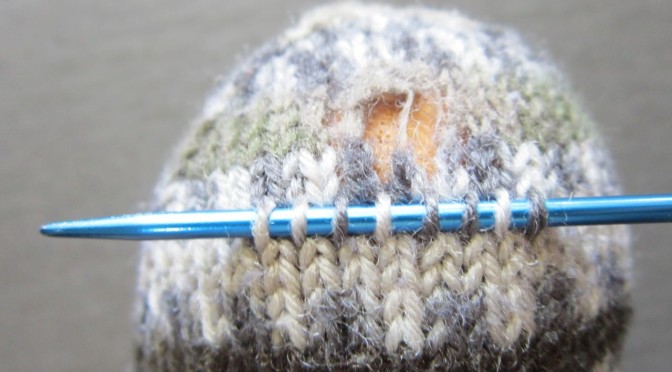
Although I usually get years of wear from my hand-knit socks, I am especially hard on the toes of socks because I have such a difficult time keeping my toenails short enough. But eventually, the inevitable happens (the pair of socks I photographed below to show are over 10 years old) and the yarn will wear thin and develop a hole.

IMG_1292

I could remove the toe area totally, and re-knit it. But I am going to show you how to darn this sock with a knit-in-place patch. This method is handy to know, because it also works well for repairing socks with wear areas in other places like the ball of the foot and heel.

Note: In the photos below, the socks from the pair I am repairing are slightly different (this is one of those self-patterning yarns that was popular in the early 90’s). I wanted to get the best photo for each major step in the process, and so sometimes the photo was of one of the socks, and sometimes the other.

Making a knit-in-place patch

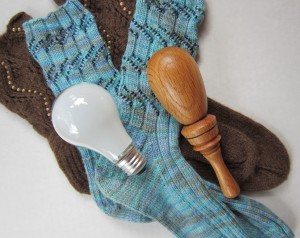
1. Place a darning egg in the sock.

IMG_1294

Don’t have a fancy sock darning egg? An old-fashioned incandescent light bulb works, too. (The light bulb doesn’t even have to work any longer, so think of this as another way of using something that you might otherwise throw away, lol.)

2013-08-11 12.55.09

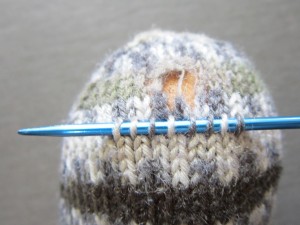
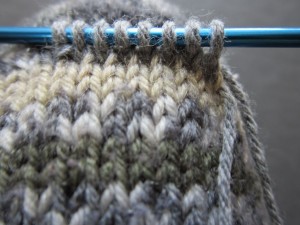
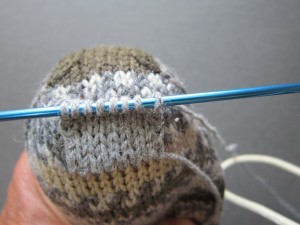
2. Onto a short double-point knitting needle in same size as used to knit the sock, pick up the loops of stitches in an undamaged row below the hole.

IMG_1296

Remove the darning egg temporarily.

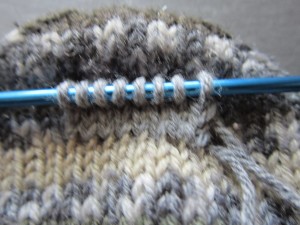
3. Using yarn in a similar weight as the sock, knit across the row of stitches on the needle, then purl back across the row. If you happen to have some of the original yarn leftover from making the sock, all the better. But if you are like me, you won’t be able to find it after 10 years or so, lol. A yarn in a coordinating color, or even a bright contrasting color, is fine to use. The patch is likely not going to be seen when worn anyway, and if it is, a bright-colored patch could be quite fun. The important thing is that you want the yarn used for the repair patch to be a comparable weight (and of course sturdy enough so that it holds up to wear for another 10 years or so again <g>).

IMG_1257

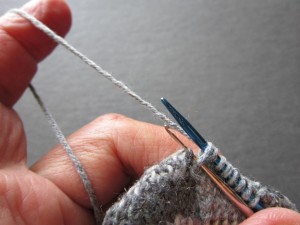
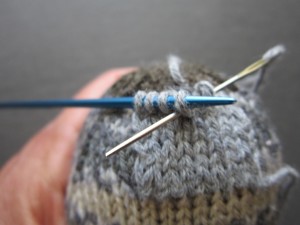
4. Now you want to continue to knit back and forth to make a square or rectangular patch to cover the hole. At the same time, attach the patch to the original sock at the beginning and end of each knit row as follows:

k2tog the first stitch of the row with a stitch loop of the original sock 2 rows above, k until one st remains in row, ssk the last stitch of the row with a stitch loop of the original sock 2 rows above.

IMG_1259

Tip: If you have difficulty picking up the stitch loop of the original sock to incorporate into the k2tog/ssk attachment at either end, you can use a crochet hook to assist pulling the loop onto the knitting needle.

IMG_1264

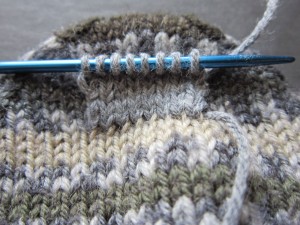
5. Continue knitting back and forth on the patch until it covers and hole entirely and you have completed a purl row. Cut yarn, leaving a long enough tail to graft the stitches of the patch to the original sock.

IMG_1261

6. Insert darning egg into the sock again. This will give a good foundation for grafting the stitches and assure that you don’t catch any of the underside of the sock when sewing.

IMG_1267

7. Thread a tapestry needle with the yarn tail and begin grafting the undamaged row of stitches above the hole to the live stitches on the knitting needle.
IMG_1281Continue grafting until all live stitches have been removed from the knitting needle and are now attached to the sock.

IMG_1285

8. Remove darning egg. Bring yarn ends to inside of sock. Turn sock inside out. Insert darning egg into the sock again temporarily, and weave in yarn ends invisibly. (I always like to insert a darning egg for weaving in ends on toes of socks, so I don’t mistakenly catch the underside layer of the sock! — you probably don’t need to ask me why, lol)

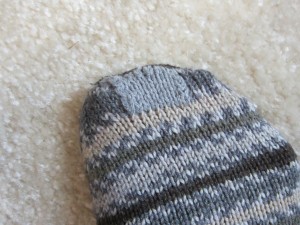
The repaired sock with the completed patch

IMG_1287

I’ve already been wearing these socks for 4 months and they are holding up great. It makes me feel good about giving new life to an old friend (my socks, that is).

Related Images:

Bison Burger Recipe

John made bison burgers last night. They are so good. I promised him that I would post his recipe on the blog if he would write up the recipe (which he has). He is teasing me now that I can’t eat or knit until I get the blog post done, lol. Of course, he doesn’t really mean it — just his way of nudging me out of my procrastination. 🙂

Have you ever eaten bison (buffalo) meat? I am not much into eating meat, but I really am surprised how much I like these bison burgers that John makes. So let us share it here with you. I hope you give it a try!

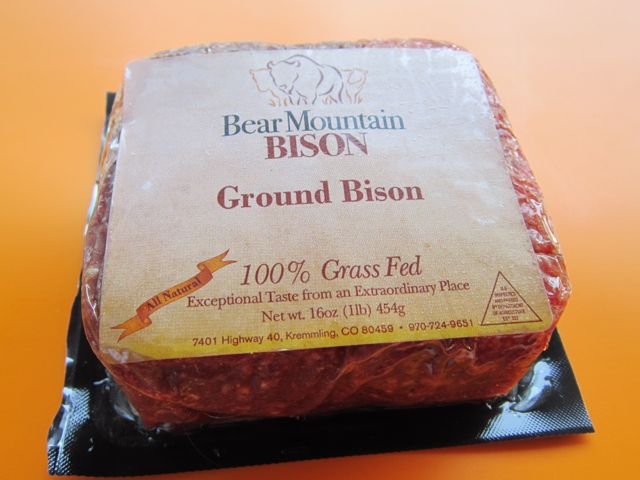
ground bison 100% grass fed

INGREDIENTS

1 pound of grass fed ground bison(we got ours from Sprouts Farmers Market)

1 1/4 tsp kosher or sea salt

1 tsp ground pepper

1/4 to 1/3 C of Panko bread crumbs

1/2 medium yellow onion finely chopped

2 cloves garlic minced

1 tsp dried sage and 1/2 tsp Mexican oregano (crushed in a mortar or spice grinder)

2 tbsp olive oil

PREPARATION

Thaw bison to room temperature.

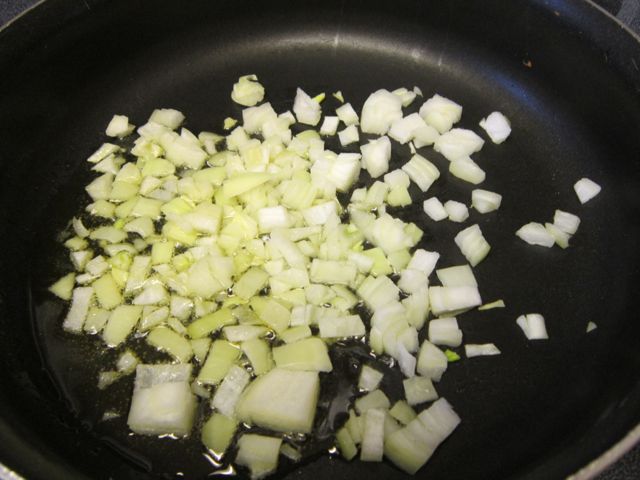
Saute onion and garlic in the olive oil until cooked and starting to brown. Then set aside to cool.

saute onions and garlic for Bison Burgers

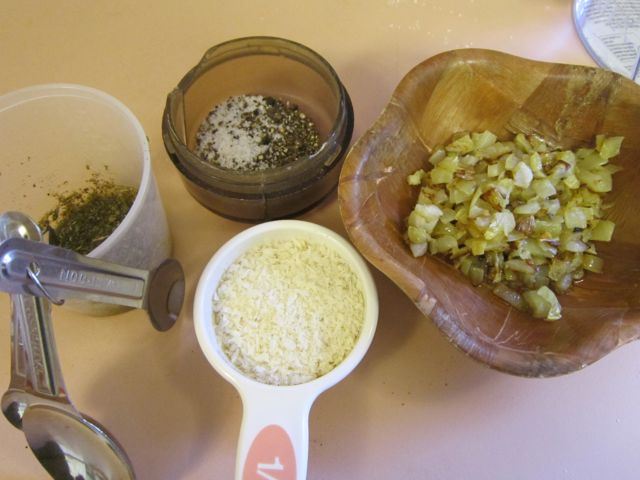
Add 1/2 tsp of water to ground sage and oregano mix to rehydrate.

the rest of the assembled ingredients for Bison Burgers

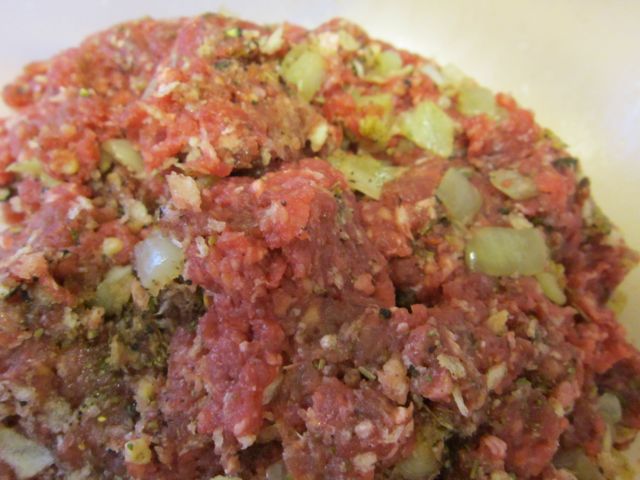
Lightly fold ingredients into the bison but do not kneed much or it will get tough.

mix ingredients for Bison Burgers

Form into four 1/4 lb or three 1/3 lb patties about 1/2″ thick and make a shallow depression in the middle of each.

form patties for Bison Burgers

Preheat a pan (cast iron is best) at medium heat and cook for 6 – 6 1/2 minutes per side or less if you want the burgers medium or med-rare.

Let the cooked burgers rest for 5 minutes before serving.

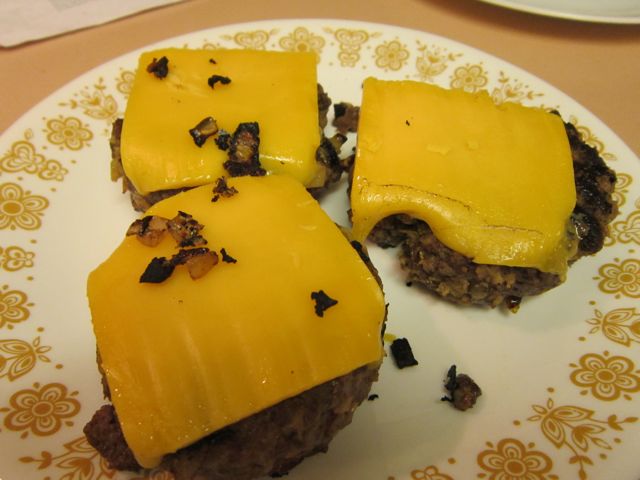
Note: cheese may be added in the last 3-4 minutes of cooking if desired.

Bison Burgers with cheese

Enjoy! John and Jackie

Related Images:

Americana: The 39-star Flag that Never Was

History Trivia – Do you know why there never really was a 39-star US flag? Read on about why it never became official …

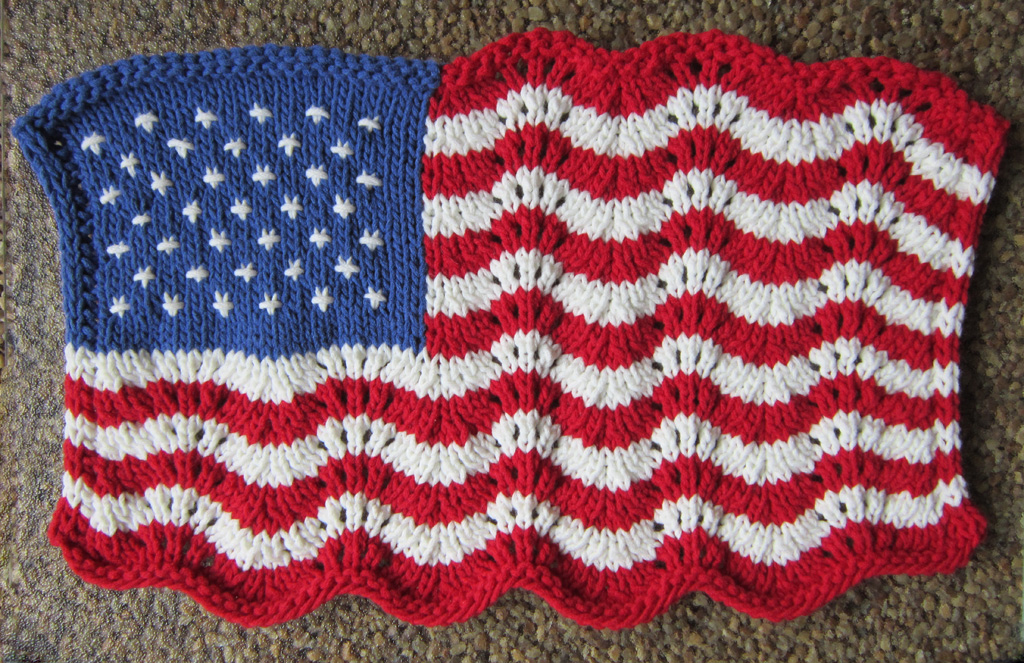
At the same time as I was designing Mini Lace and Beaded Flag way back in 2001, I had charted a larger-scale version with half-embroidered stars. I went ahead and published Mini Lace and Beaded Flag (the 50-star beaded mini version) in 1991, with the intent of completing the design of the 2nd version shortly afterwards. As many other things in my life, that project got set aside for many years. 12 whole years in fact!

So here it is 2013, and I stumbled across that 12-year old chart I had made. Excited to get back to working on this, I arranged with Crystal Palace to use their Cuddles yarn for the sample model.

The knitting went along quickly with no problems. Glad I was so smart 12 years ago and had charted all the details perfectly so that I could just enjoy making the project without having to re-figure anything. Love the Cuddles yarn, too. No bleeding — an important factor when putting red and blue yarn right next to white.

I was in the process of completing the embroidery on the “stars” before I realized I had 39 stars rather than 50. Duh! I am sure I knew about this 12 years ago. But I had forgotten. It is a design constraint within which I was working so that the feather-and-fan stitch pattern for the wavy red and white stripes would align properly with the blue union. No problem — this isn’t a real flag, of course.

But it did get me to thinking about whether there ever had been an actual 39-star flag. Excerpted from http://flagspot.net/flags/us-39.html

” Q: When did the U.S. flag have 39 stars?
There never was an “official” 39 star U.S. flag. However, flag manufacturers betting on early sales misjudged in 1889 by believing the two Dakotas would be admitted as one state and the others would be delayed until after the 4th of July. Both Dakotas, Montana and Washington were made into states in November, 1889 and Idaho was admitted July 3, 1890! … “

Thus the next official U.S. flag had 43 stars, not 39 (or even 42, since it surprised everyone that Idaho was admitted just under the wire of the July 4th cut-off).

There are pictures of a couple of 39-star flags that manufacturers had designed in anticipation of the entry of the Dakotas as one state in 1889. Neither is anywhere close to the arrangement of stars I happened to come up with for my Americana pattern. I wonder if there is a little bit of Betsy Ross in me? hee hee

Americana

Related Images:

Now a word about bunnies

Republished from Issue #112 of HeartStrings Knitterly News. Read on about this local children’s literacy program.


I am pleased to have Tracey Graham as the guest writer for this month’s feature article. She shares about her local “Read to Your Bunny” literacy program. I think you will like it, and might even be inspired to do something similar in your area. So without further ado, let’s hear from her.

My friends and I have knitted up dozens of your gorgeous little bunnies for our local Read To Your Bunny literacy program. The program provides a book by Rosemary Wells, entitled Read To Your Bunny, {http://rosemarywells.com/?page_id=141} information about the importance of reading to children while they are very young, a library card application, a coupon for our local independent bookstore, and a handcrafted, lovable squeezable bunny for each new baby born in our local hospital.

In the almost three years since two wonderful teachers (Janice Romeiser and Eleanor Browning) started this program in our little city of Emporia, KS (population ~28K), more than 1300 little babies and theitr parents have gone home with the RTYB package.

Most of the bunnies are made of washable cotton fabrics, lovingly cut out and stitched by the local quilt guild, stuffed and clipped by a bunch of volunteers who meet for monthly “Bunny Bees”, then get their eyes added in permamnent, nontoxic fabric paint on by co-Bunny-Queen Eleanor. That’s _most_ of them. But in the mix have been approximately 50 or so bunnies made by me and my knitter friends using your wonderful pattern. Every swatch I make becomes a bunny eventually, and most have gone on to a good home.

Earlier this month, on Worldwide Knit in Public Day, we had a knit-in at our farmers market and held a drawing for a GIANT bunny that I made from a ~20″ square. The drawing proceeds ($27.50) went to the RTYB program to help pay for the books, stuffing and copying materials. I have all made up a series of five bunnies in different stages of completion – just the square, head added, front feet stitched, back feet stitched, and ears added to show people the magic that happens when we follow your ingenious pattern each step of the way.

I guess what I’m trying to say here is THANK YOU for posting your ever so clever pattern online where I could find it three years ago when I wanted a quick and easy knitted bunny to add to the variety available for the RTYB program! This pattern has been so much fun for all of us!

While I do sell some of my knitting (scarves, hats, mittens, sweaters, etc.) at craft shows and art fairs, and I do keep some bunnies on my table for display (my business name is BoyzenBunny Fiber Arts – named for a stuffed rabbit I received as a gift more than 20 years ago – I’ve been a rabbit collector for years and years), I do not sell any of the bunnies knitted from your pattern. I have won a little bit of prize money at our local county fair with a particularly spectacular knitted bunny, but in keeping with the generosity of your free pattern, I do not sell bunnies. All the ones I’ve ever made have been either donated to a cause, or given away as gifts.

Thanks again for the great pattern. It’s so much fun to see what one can do with different yarns of different textures and gauges!

Tracey Graham


Subscribe to HeartStrings Knitterly News to receive announcements, knitting tips, tutorials, musings & nice surprises, conveniently delivered to your email in-box
.

Related Images:

10 Kitchen Dangers That All Savvy Housewives Should Learn To Avoid

There’s a nice saying from the Dalai Lama which goes like this: “approach love and cooking with equal abandon”. That’s a very good tip, indeed. Cooking and love are actually connected to the same idea of pleasure, satisfaction, and happiness. But spending a lot of time in the kitchen might also mean to face big dangers, due to the use of knives and ovens… here’s how a pleasant and nice activity like cooking becomes a nightmare for the rest of the body!

Don’t Be Scared! Learn To Avoid The Dangers!woman in the kitchen

If you are a housewife on your first attempts in the kitchen, don’t be scared of using the sharpest knives or of facing hot ovens… we’re going to suggest you the best ways to avoid the most common kitchen dangers.

In fact, although the kitchen is known to be the most dangerous room in a house, everyone can become a talented cook, just keep in mind what are the strongest and weakest points of your own kitchen.

10 Tips For Kitchen Safety

  1. Never play with fire and if you have small children around you while cooking, make sure that they don’t play with the fire as well. If you can, turn off the stove and keep all sharp items out of your children’s reach.
  2. While boiling or roasting food, always stay near in and keep control over the cooking process. This is a golden rule not only for making sure that everything is going the right way with your tasty recipes, but also to avoid children or other people from getting burnt by accident.
  3. You should always keep all possible items that can catch fire (for instance, wooden tools, paper or plastic boxes or others) away from your stovetop. Even a 1-second distraction can cause a disaster. It’s been calculated that most home fires happen in the kitchen.
  4. If you have pets, make sure that they won’t follow you to the kitchen. Their hair can be seriously at risk as it’s fire-catching. Moreover, pets may prevent you from reaching the table or any kitchen appliances if they keep laying or walking around you all the time.
  5. It’s important that you wear close-fitting sleeves when cooking, so you won’t risk getting your sleeves burnt when you are handling pans and you will also avoid knocking things accidentally (for example, you may knock a bottle of oil or of hot food).
  6. A kitchen is full of objects and cooking equipment made of metal. Keep in mind that metal things can heat very quickly. So, always use oven mitts and make sure to buy new ones when the old mitts have holes or they got too thin to be used. Many people use a wet towel in the place of an oven mitt, that’s not always a smart solution, because when you less expect it the towel begins to burn, as well.
  7. Fried dishes are delicious, but be careful when handling pans with boiling oil or frying foods. Even the smallest drop of frying oil may cause serious problems, like skin burns. Anyway, a good rule is to keep all liquids away from hot oil, otherwise, the oil will splatter out of control.
  8. Often time, we all have tended to postpone cleaning the kitchen after the meal. However, if during the cooking a spill ended up on the floor, it’s recommended to clean it up immediately.
  9. Always keep your kitchen decluttered and clean. Clutter prevents you from finding the specific cooking tool you are looking for, which might cause your food to get burnt in the meanwhile. Moreover, clutter makes confusion in your mind and you may forget sharp tools at an easy reach for your children.using a kitchen knife
  10. Keep your knives always off the reach of children. You’d better keep them in a safe place or in a specific box. Make sure to have a cutting board to use knives (don’t cut foods on the surface of your table). When handling knives for usage, keep your fingers always on the top of the blade, so in case the knife slips from your hand you won’t get injured.

If after following all the above tips you still get yourself into a kitchen emergency – you get locked outside your house when the stove is on or you can’t open your kitchen door to get to the rest of your house  – you can call 247 ASAP Locksmith, an excellent emergency locksmith company in the US. If it’s not an emergency where you need to call the fire department and you have time, a locksmith can get you into your house quickly and for an affordable price and allow you to save your home.


Related Images: