All posts by Jackie E-S

Jackie E-S is the owner of HeartStrings FiberArts, a showcase for her growing roster of original pattern designs. As a certified master knitter and teacher, Jackie continues to share her love of knitting and knowledge through design and publication of skill-building pattern instructions, and conducting workshops, programs and demonstrations. Her interest in the fiber arts extends beyond knitting and spinning to include weaving, dyeing and all needle arts. She also enjoys contract bridge and music.

Friendship Day: Joy’s Troika Wrap-around Faroese Shawl

Today is Friendship Day, a day to honor friends. You might remember my friend Joy when I posted about the fab Beaded Winter Wonderland Socks she knit. I dedicate today’s blog post to Joy and share with you the Troika Wrap-around Faroese Shawl she recently completed.

Joy's Troika Shawl
Joy's Troika Shawl

Here is her story:

I’ve wanted to knit the Troika shawl for a long time, and I had the right amount of yarn for one colour (a deep purple in Paton’s Classic Merino) leftover from another project, so I kept trying to match it, on a budget.  I was really happy when I did, and was so excited to cast on and start it.

The yarns I used ended up blending their colours in a very striking way.  I had tried to pick matching colours but never expected the result I appear to have gotten.  The variegated yarn has a high percentage of mohair, and the ivory coloured one is a balpul (hope I spelt that right) so I think that helped them mix better.

I’ve had strangers and people who usually are oblivious to clothing compliment me on it so it does seem to be something special to look at.  And I adore wearing it!  Its so cosy!

I’d just gotten past the section with the several increase rows when a fond friend had a misadventure and I had a terrible time.  I can’t describe the misery I went through.  Really believe your Troika shawl kept me sane.  I spent days just knitting it, those long garter stitch rows were precisely what I needed just then.  I cast it off a little before I got the news that things were sorted out.  So in a lot of ways this is a very special shawl.  And it is very warm and still very light, … and so easy to wear!  Always thought being able to tie it would be a fabulous feature, and its even better then I’d imagined it would be.


The back of the Joy's shawl
The back of the shawl showing the Faroese gusset shaping

Joy, thank you so much for sharing your special shawl and it’s story. I can almost feel its comfiness in the photos. I think it is neat to blend yarns, and I am always intrigued with what people come up with. I agree that the colors come together very well in this.


Side view of Joy's shawl
Side view of Joy's shawl: The Faroese shawl tails are tied at the back of the waist. The shoulders of this design are shaped for hands-free wearing without slipping

Photo credits: Joy’s Mother.

More information about the HeartStrings Troika Wrap-Around Shawl pattern and other Faroese Shawl Patterns.

I am SO appreciative of all you, my friends. Thank you for following me, sharing and supporting.

Today I hope you can spend time with your friends, too, whether near or far, and express love for them in ways whether small or large.

p.s. Friendship Day celebrations take place on the first Sunday of August every year. The tradition of dedicating a day in honor of friends began in US in 1935 and has since spread to many other countries. Are you celebrating where you live?



Related Images:

Grilled tomatoes with cheese, prosciutto, and basil

Here’s a simple and quick summer meal. You’ll need:

  • fresh tomatoes
  • seasoning mix
  • fresh basil
  • cheese
  • prosciutto
  • oven tray
  • aluminum foil
  • broiler

For the tomatoes and basil, I enjoyed the bounty from my garden. Or shop your local fresh market.

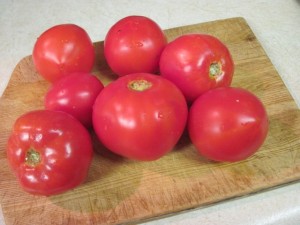
Fresh tomatoes from my garden

 Wash the tomatoes, remove stem area and cut in half. Wash some fresh basil, pat dry, remove leaves from stem and chop them coarsely.

Wash some fresh basil
Wash some fresh basil (I used cinnamon basil)

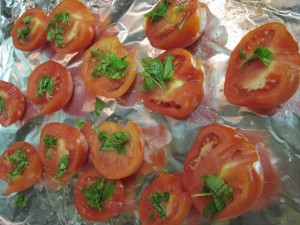
Place tomato halves in a single layer on an oven broiler or cookie tray (lined with aluminum foil for easy clean-up). Lightly season as desired (I used Zatarain’s Creole Seasoning). Sprinkle with chopped basil leaves.

Halved tomatoes sprinkled with seasoning and chopped basil

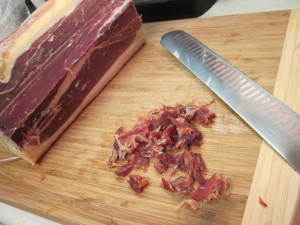
Slice some prosciutto very thinly and chop it into small pieces.

Thinly slice and chop some prosciutto

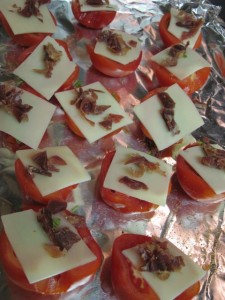
Place a piece of cheese on top of each tomato. (I used Emmentaler swiss cheese.) Then a bit of the chopped prosciutto on top of the cheese.

Top with cheese and prosciutto

Place tray under heated broiler. Grill until cheese starts to turn golden and prosciutto crisps. This should go relatively quickly so that the topping is cooked, yet leaving the tomatoes still rather firm rather than mushy.

Grill under broiler
Grill under broiler


It’s smelling good, looks good …

Grilled tomatoes
Grilled tomatoes

… and tastes good, too. I guess you’ll just have to either trust me on that last part, or try this out for yourself. Enjoy!

Related Images:

Jewel Tone Finesse by Colinton

A collection of 9 jewel tone dyed colors of Colinton’s distinctively silky Australian mohair yarn launched in June 2012, bringing the Colinton Color Finesse collection to 18 colors + natural pearl white.

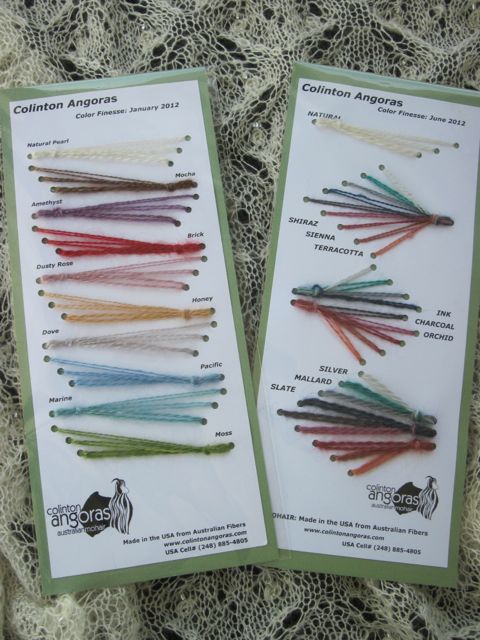
Not to be outdone by their first Color Finesse sample card (left) for the collection of classic hand-dyed colors launched in January 2012, owner Brandyn designed fans of colors for the sample card of their newest collection (right). Isn’t it pretty? I love the artistic thought behind the laying out of the card (and appreciate the work involved in making up beautiful sample cards like this!) — it is another keeper.

Colinton Sample Cards
Colinton Color Finesse Sample Cards

All 19 colors are available in all 3 yarn weights. Wholesale inquiries to Colinton Angoras. Stockists of Colinton yarns and kits.

So what’s your favorite color???

COLOR FINESSE CLASSIC (to left). The original 9 classic colors plus Natural Pearl released at January 2012 TNNA.

  • Natural Pearl
  • Mocha
  • Amethyst
  • Brick
  • Dusty Rose
  • Honey
  • Dove
  • Pacific
  • Marine
  • Moss

COLOR FINESSE AUTUMN (to right). 9 new jewel tone colors released at June 2012 TNNA.

  • Shiraz
  • Sienna
  • Terracotta
  • Ink
  • Charcoal
  • Orchid
  • Silver
  • Mallard
  • Slate

HeartStrings patterns for Colinton yarns (also available as kits through Colinton).

  • White Lotus Lace Stole (shown in the background of the photo above with the sample cards; this stole would be lovely in Dusty Rose or Orchid and carry along the theme of lotus flowers)
  • A Touch of Beaded Class (I’d love to make this in the Silver color; I think it would be really rich looking and go with everything!)
  • Coronet Collaret (any color to go with a favorite top in your wardrobe that you want to dress up with a bit of lace — can go either way for casual to dressy)

Related Images:

Transferring Pre-strung Beads

Over at the KnitHeartStrings.com learn-and-knit-along site for Bits of Lace July 2012, we have been working on a beaded lace edging ornament. This project uses the “slip/slide a bead into place between stitches” method which requires that the beads to be strung onto your yarn/thread before knitting with the beads.

The pattern for Antique Satin and Lace Ornament that we are using (free for Bits of Lace members through the end of July 2012) briefly explains preparation instructions for both loose and pre-strung beads.

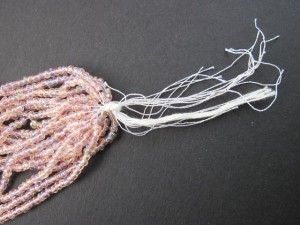
By pre-strung beads, I mean tiny beads that you buy in a hank that are strung on a temporary thread.

Hank of pre-strung beads

Actually, I seldom use pre-strung beads because I prefer to use and sell the high-quality Japanese beads that only come loose. But for craft-type items that are not going to be washed and/or take a lot of wear (like this month’s ball ornament project), if you have pre-strung beads, it is fine to use them. You can take advantage of the beads already being strung on temporary thread, and just transfer whatever quantity of pre-strung beads you need to the yarn/thread with which you will be knitting.

Here are step-by-step visuals to show you how I do this —

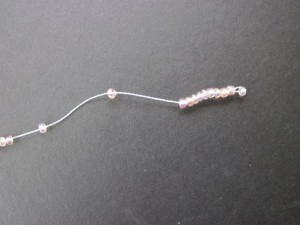
Begin by pulling the end on only one of the strands of beads loose from the knotted bundle, leaving the other ends still secured.

Loosen a strand from the knotted bundle

For most hanks, I’ve found that pulling a strand loose is easy to do, but some others are stubborn and I have to cut the strand near the knot and remove a few beads before proceeding.

You are going to need some space to make a knotted loop that will act as a “string needle eye” during the transfer. I do this one of 2 ways:

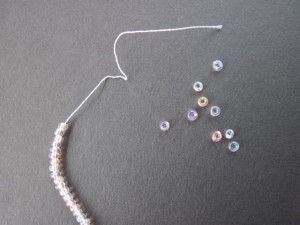
Option 1. While leaving the other end of the bead strand still secured in the bundled knot, remove a few beads as necessary to make space on the string to form a knotted loop. You can always re-string these loose beads later if you want. (Personally, I just toss the few stray beads like this in a pretty glass container that I keep on my bookshelf. One day I might do some kind of ad hoc project with the mixture I’ve been collecting, but for now I am just enjoying all the bead colors and sizes coming together like a serendipitous piece of art.)

Remove a few beads if necessary to make space on the string

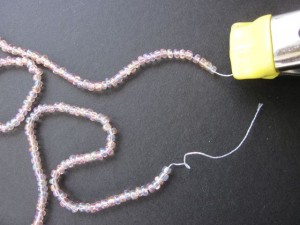
Option 2. Clamp the first end you pulled loose, then pull the other end of that same strand free of the knotted bundle. By clamping one end tightly, you can move the beads toward the clamp without fear of them falling off the string, and gain an extra inch or two of space overall on the string — usually enough so that the space at the other end of the string is now enough that you don’t have to remove any beads.

Clamp one end and pull other end free

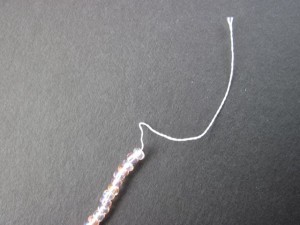
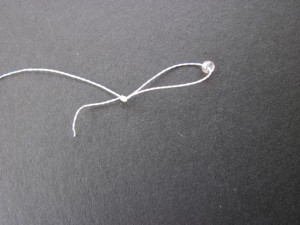
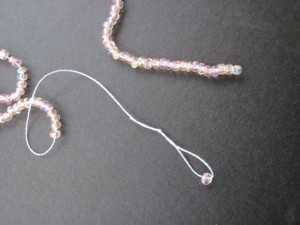
Tie a compact, tidy overhand knot, leaving an open loop that will serve as the “eye” of the string needle. The eye does not have to be very big — just big enough so that you can get your yarn/thread through it. But it doesn’t hurt to be larger than you actually need either, because then it is easier for the next step.

Tie the end into a loop

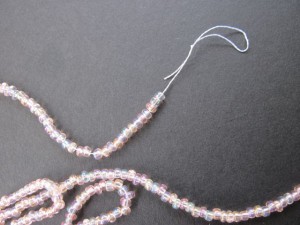
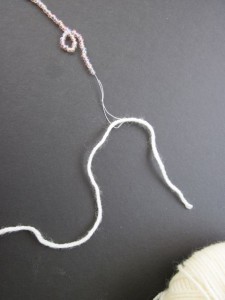
Now insert your project yarn/thread through the knotted loop and pull through enough of a tail so that there is no fear of it coming out during the subsequent transfer of beads.

Pull project yarn/thread through knotted loop

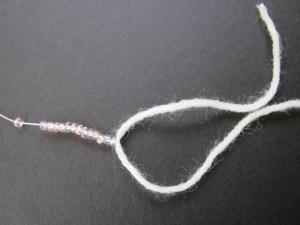
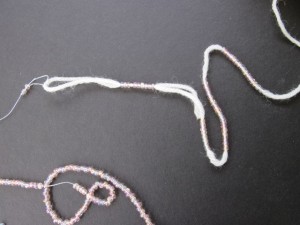
Slide some beads over the knotted loop …

Slide some beads over the knotted loop
Slide some beads over the knotted loop ...

… and onto the project yarn/thread.

Slide beads onto project yarn/thread

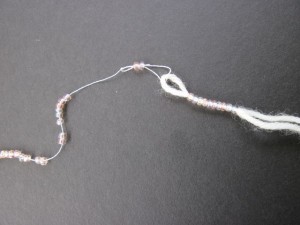
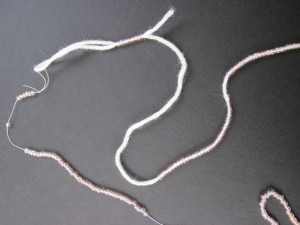
Continue sliding beads from the pre-strung thread onto your project yarn/thread until all beads on the strand are transferred or as many as wanted.

Continue sliding beads from pre-strung thread onto project yarn/thread
Continue sliding beads from pre-strung thread onto project yarn/thread ...
until all beads on the strand are transferred or as many as wanted
... until all beads on the strand are transferred or as many as wanted

Then remove the project yarn/thread from the knotted loop, and you are ready to knit with your strung beads.

In some cases you may need more beads than on a single pre-strung strand. In this case, you can repeat the steps above with as many strands of pre-strung beads as needed.

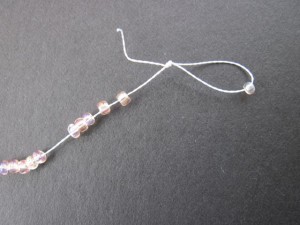
In some cases, you will have remaining beads on the pre-strung strand that you don’t need right now. So you will want to secure the temporary thread in a way so that the remaining beads don’t fall off. This is what I like to do —

Tie a loop with a bead stopper
Slide beads towards end
Beads won't fall off now

If you’ve pulled the other end of the strand loose from the knotted hank, make a bead stopper at that end, too, so the beads don’t fall off.

Tie other end with bead stopper

Hope you’ve enjoyed this little photo tutorial and learned a thing or two along the way.

Interested in some more knitting with bead tips and techniques? Check out other bead information resources I’ve prepared.

Happy knitting and beading!

Related Images:

Let’s have more Christmas in July

Let’s have some more fun with Christmas in July!

Carrying on from last week’s enthusiasm about Knitting for Christmas in July, I decided to offer kits for the Bitty Beady Christmas Tree since I was getting requests to give knitters a jump-start in conveniently getting the yarn and beads from one source.

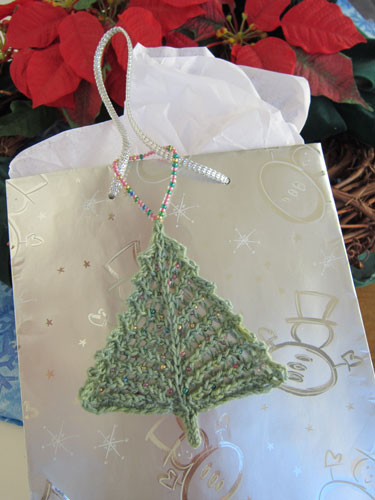
Bitty Beady Christmas Tree gift bag decoration

So now you can get Materials Kits for Bitty Beady Christmas Tree starting at just $3.95. There are several color options for yarn and beads that mix-and-match for appealing to a range of traditional, vintage and modern schemes.

You’ll get all the materials you need to make one Bitty Beady Christmas Tree. NOTE: Pattern not included. Please purchase downloadable e-Pattern separately.

Besides your choice of yarn and bead colors, a floss threader is included IF you want to string your own beads. OR you can purchase the upgrade option to get the beads already strung on the yarn ready to start knitting right away!

You may also purchase a coordinating greeting card with envelope. This makes a nice gift enclosure to go along with either giving the kit itself, or with your completed bitty tree.

Even if you are not interested in a kit, you can purchase the pattern individually and use small amounts of glitzy yarn you have on hand, e.g. metallic yarn, or yarn that has been plied with beads and you just let the beads fall where they may. Want to go smaller (or larger): Other ideas and inspiration for variations on the Bitty Beady Christmas Tree.

Let’s enjoy small projects like Bitty Beady Christmas Tree while the weather is hot-hot-hot. It’s not too early to start getting ready for Winter holidays now, especially if you are like me and the months are just flying by. Where-oh-where did over half the summer already go!

Related Images: