Cotton Roving – braiding, dyeing, spinning and knitting

I have some photos to share from a “cotton study” project I did quite some time ago. It was always my intent to do a write-up with the pictures, but you know how intentions can sometimes go by the wayside. Here I am many years later looking through my photo albums and was reminded again of that short article that I still wanted to write. Well, here it is finally!

Unfortunately I don’t have any photos of the step-by-step process I used. I will just have to talk it through. For those familiar with dyeing and spinning, you should be able to follow along well enough and surmise. For those unfamiliar with these, maybe you can just enjoy the pretty colors and inspiration.
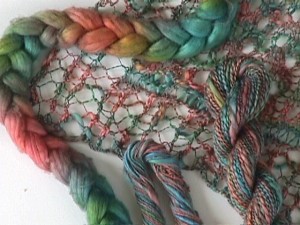
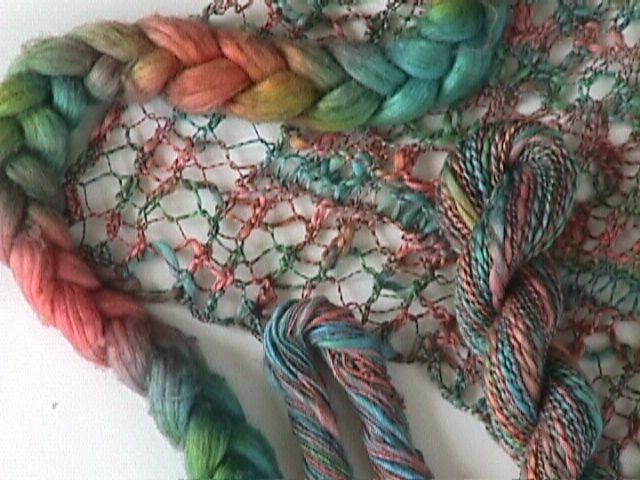
Stages of cotton dyeing, spinning, plying and knitting
Stages of cotton dyeing, spinning the singles, plying and knitting

The above photo shows

  1. the braided un-spun roving after dyeing
  2. the singles yarn
  3. the singles plied with fine rayon sewing thread to make the 2-ply knitting yarn
  4. and the result of using the 2-ply yarn to knit the HeartStrings Reversible Lace Cables scarf pattern

Dyeing the cotton: I started with un-dyed white cotton roving. I broke off lengths of roving about a yard long each and braided them. Then 3 colors of fiber reactive dyes were applied to the braid. After the dye was set and rinsed, I let the braids dry completely.

Spinning the singles: I undid each braid (sorry I can’t remember how many I had, but the total weight was 1.75 oz / 50g) and spun each length of dyed roving separately into an S-twist singles. I used long draw from the “wrong end” of the roving on my Lendrum spinning wheels highest speed whorl. For you spinners, you know that cotton roving will draw out more smoothly in one direction than the other. I intentionally used the other direction to produce a lump, bumpy textured singles strand of spun yarn. (this is harder to do than you’d think after you’ve spun for a while!) I wanted a yarn that when knitted into the lace, would produce a casual, somewhat rustic look.

Plying: I plied the spun singles Z-twist with fine rayon sewing thread to make a 2-ply knitting yarn.

Here is a photo of the knitted scarf that I took recently with a different camera in different lighting (the original picture above was taken in the 90’s! — my, how digital cameras have advanced, haven’t they?)
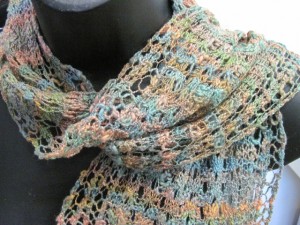
Reversible Lace Cables Scarf in hand-dyed, hand-spun cotton

Here’s a bit more of a close-up so that you can see the texture of the yarn in the stitches.
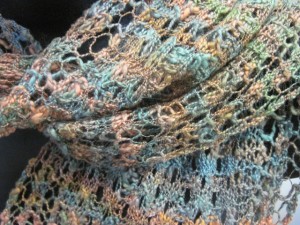
Detail of the textured yarn knitted into the lace stitch pattern

p.s. Do you recognize this scarf as having been knit from the same pattern in last week’s blog article Spinning a 2-ply laceweight yarn for a scarf?

Related Images:

That little extra personal touch pays off

Here is a comment that a customer made to one of the shops that handles orders of my HeartStrings patterns.

I’m glad to have this opportunity to tell you how pleased I was with the “personal touch” in the form of a hand-written note using my first name on the packing slip!! I also appreciate your offer to help if I have questions. Thank you very much for your prompt service. It was also nice to know that you, too, are in New Hampshire! Thank you for a great experience!!

You can’t help but feel that the little extra touch (and time) this shop takes with their individual attention has paid off (and will continue to pay off) with loyal, satisfied customers.

I am so thankful to have shops like this providing such excellent service to customers who purchase my HeartStrings patterns. That leaves a good impression all around.

Related Images:

Priceless because they just grow up too fast

Here is a photo that Doreen sent in to share of a HeartStrings Dolly Faroese Shawl pattern she made for her precious granddaughter. As you can see, the shawl is modeled on gd’s teddy bear. Isn’t this just too cute?! Thank you Doreen for sharing.

Bear's Faroese Shawl
HeartStrings Dolly Faroese Shawl knitted by Doreen for "Bear", her granddaughter's teddy bear.

Related Images:

A small(-er) family reunion

Today is my Daddy’s birthday. Even though he is no longer with us, I am singing “Happy Birthday” in my heart. Just like he used to say to me that I would always be his little girl, well … he will always be my Daddy and have a permanent place in my heart and thoughts.

The Erickson Family at parent's 45th wedding anniversary
Looking back - The Erickson Family at parent's 45th wedding anniversary

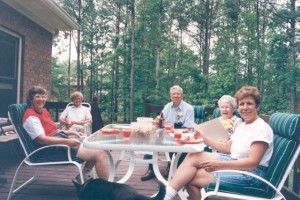
I am very fortunate that my family has always been close, even though separated by distance spanning one coast of the US (and into Canada) to the other ever since we moved from the Chicago area when I was quite young. After my Mommy passed away in the 90’s, Daddy moved closer to my two sisters and I. The move he made was from Arizona to Georgia (where my youngest sister Marilyn lives). It made sense to him (and finally to me) that he chose the mid location of his 3 daughters. (I live in Louisiana and my other sister Carolyn lives in North Carolina.)

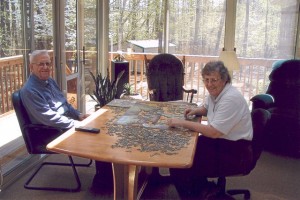
Marilyn and Daddy - A given was to always have a jigsaw puzzle out to be worked on
Daddy and Marilyn - A given was to always have a jigsaw puzzle out that we could all work on

Now that move of my Dad’s was not very close for either Carolyn or myself. It wasn’t like “just drop in down the street”. So we 3 girls started a family tradition of us all getting together with Daddy at a time around his birthday. And that is what we will be doing this week. It is our small family reunion, albeit smaller than before. Even though my Daddy will not be there as such, I know his presence will be felt.

Here’s to you Daddy — Happy Birthday! I love you.

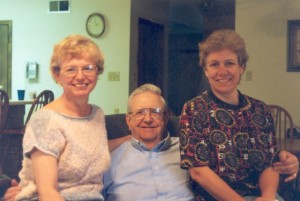
Daddy with 2 of his 3 "little" girls: Jackie and Carolyn
Daddy with 2 of his 3 "little" girls - Jackie and Carolyn

p.s. Did you notice the rhyming of the 3 daughter’s names? Jacquelin, Carolyn and Marilyn!

Related Images:

“No Sew” method of attaching buttons


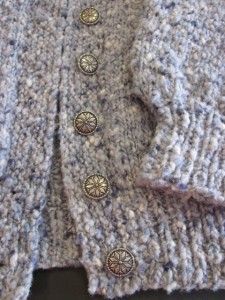
Buttons attached to button band without sewing

Have you ever thought about attaching your buttons directly onto a sweater button band as you knit/crochet, rather than sewing them on afterwards? I did that a number of years ago when making Medrith Glover’s Circumnavigated Cardigan. The unique construction of this sweater produces a totally seamless garment. Yay! no seams to sew. (Which I usually do try to avoid anyway unless there is a trade-off that warrants sewing as the lesser of two evils — also see To Seam or Not to Seam).

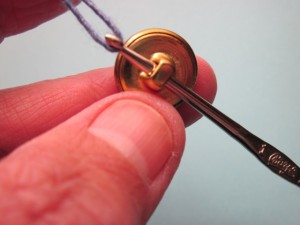
Pulling a loop of yarn through the button shank

As I neared the final steps of the sweater though, I realized that there would still be buttons to sew on. That got me thinking about making this project into a totally “new sew” one. My approach was to actually knit the buttons into the band. While knitting the band, when I reached a place where a button was to be attached, I just

  1. pulled up a loop of yarn through the button shank,
  2. placed that loop on the working needle, then
  3. knitted the extra loop and next stitch together. Voila — button attached and no sewing to be done later.

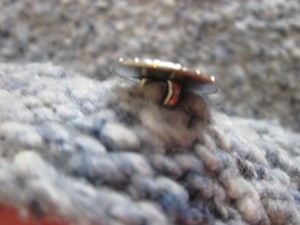
    Detail of button knitted directly into the button band
    Detail of button knitted directly into the button band

Some points —

  • This method is appropriate only for buttons with shanks.
  • To pull up the loop of yarn through the button shank, I used a small crochet hook (or you could use a small piece of bent wire).
  • I would only recommend this technique be used with a sturdy yarn and a relatively firmly knitted button band.
  • A similar approach could be used with a crocheted button band.

So that’s a little about attaching buttons to a sweater band while knitting or crocheting. Tuck it metaphorically into your knitting bag of tricks and it just might come in handy some day for a “when you’re done, you’re done” project.

Related Images: