Tag Archives: featured

Gluten Free Flaxseed Bread

One of the new kitchen toys I got this past winter was a Zojirushi bread maker. The model is called Home Bakery Virtuoso.

Among many other bells and whistles, this bread maker has a Gluten Free cycle. Baking gluten free is a relatively new thing for me. I don’t have celiac disease, nor am I even gluten intolerant as far as I know, but I just have had it in my mind to have more variety in my breads, etc. So I’ve been trying out alternative types of flours, baking methods etc. It has been an enjoyable learning experience for me.

My first attempt at using one of the recipes (called “Gluten Free Brown Rice Bread”) was quite a failure although I eventually ate all the evidence, lol. The center collapsed horribly; the texture was too dense and wet, and yet the bread would crumble when attempting to slice. In further reviewing what I had done, I attribute that failure to operator error (I later took the time to look at the DVD videos that came with the bread maker and realized that I should have scraped down the sides partway thru the cycle) and too many substitutions (I was trying to just use what I had available or could easily get at local stores).

My next attempt used another recipe in the booklet called “Gluten Free Flaxseed Bread”. Because of my inexperience and previous failure, I decided to follow the recipe exactly for this one. It turned out very well as far as taste went and well enough in texture (although far from perfect), to want to try it again.

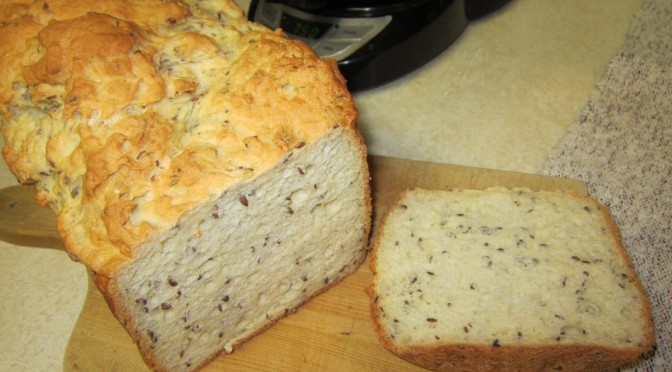
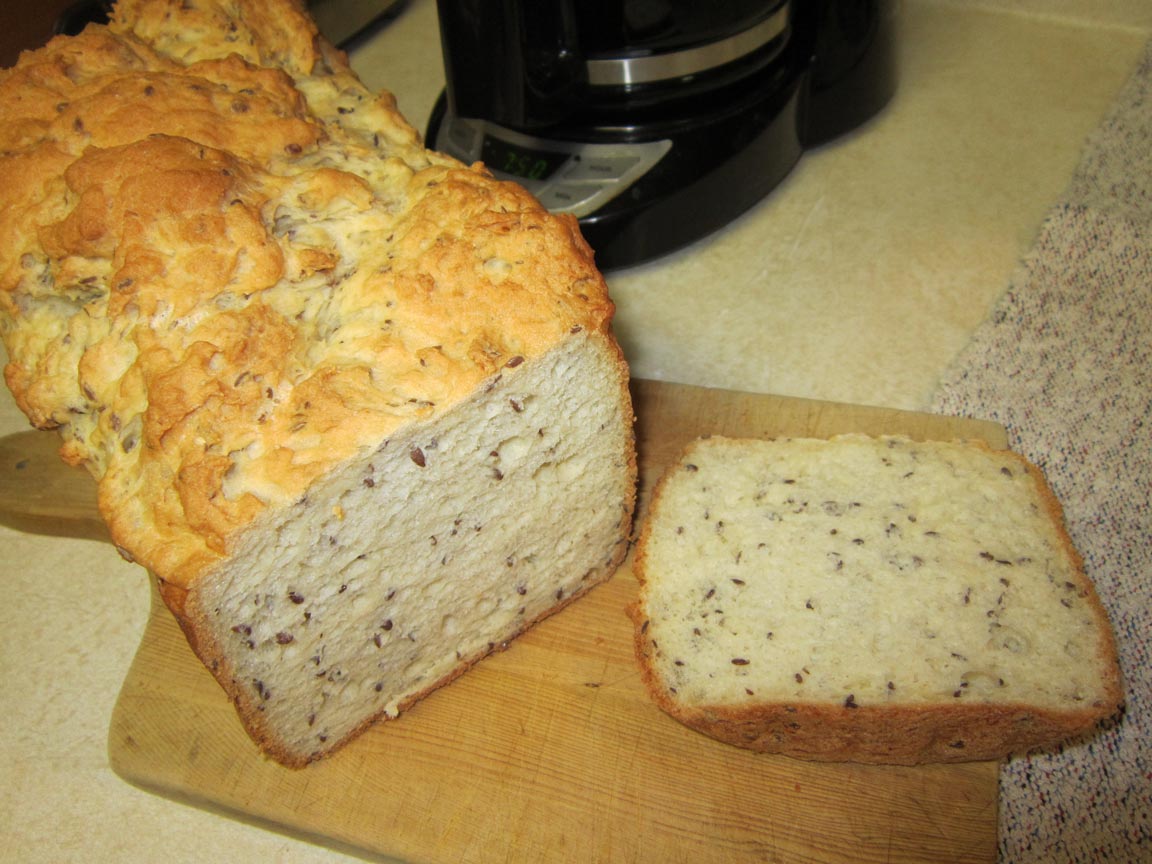
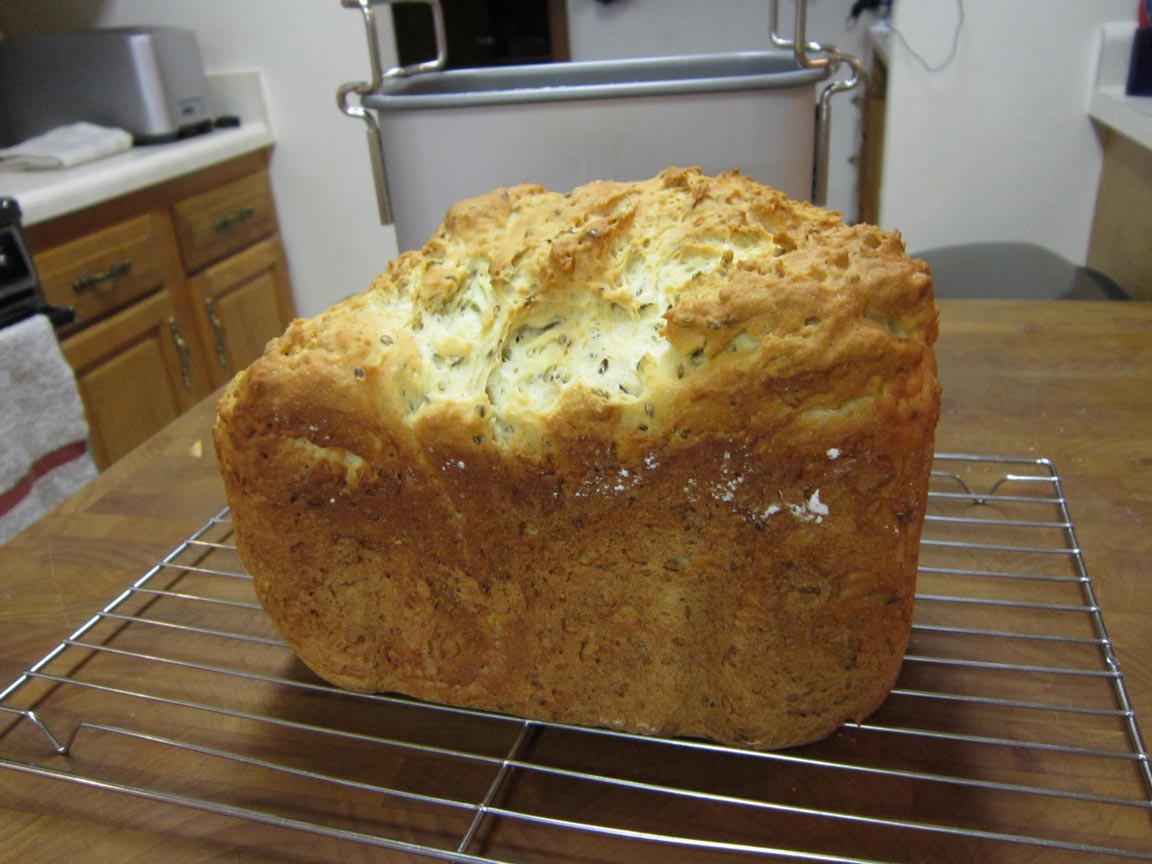
With a few revisions to the recipe in my most recent attempt, this time the bread was nearly perfect for my liking. Good rise, golden crust, good texture (uniform crumb and sliced well) and a deliciously satisfying taste.

gluten-free-flax-bread

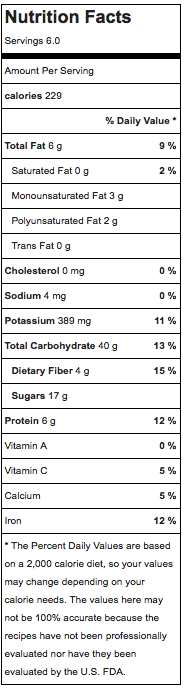
For those who have been asking, here is the ingredients list I used. Recording this information here will also help me remember what I did so I can make it again, too!

Gluten Free Flaxseed Bread ingredients list

1-2/3 cups cultured milk (I used homemade kefir milk)
3 large eggs
3 tablespoons flax oil
3 tablespoons honey
1-1/2 cups brown rice flour
1-1/3 cups potato starch
1 cup tapioca starch
1 tablespoon xanthan gum
1-1/2 teaspoon salt
1/3 cup golden flax seed
1 tablespoon active dry yeast

Notes on Method

The night before (or 8 – 12 hours):

mix cultured milk and rice flour in a bowl, cover with towel and leave to soak on countertop.

The day of:

In separate bowl, beat eggs, then mix in flax oil and honey.

In yet another bowl, add remaining ingredients except yeast, and whisk together.

Into bread maker pan, pour egg mixture, then soaked rice flour on top of that, then the mixture of dry ingredients on top of that.

Make a slight indentation into the dry ingredients, and sprinkle in active dry yeast. (the yeast should not come in contact with any of the wet ingredients)

To bake:

Set bread maker menu to Gluten Free Course and Dark Crust settings.

Press Start on the bread maker. Follow suggestions in bread maker instructions for scraping down sides of pan when the “add in’s” beep sounds (or just after the initial mixing and before the first rise).

Peaking at the progress of the bread baking through the view window of the Zojirushi Home Bakery Virtuoso bread maker
Peaking at the progress of the baking bread through the view window of the Zojirushi Home Bakery Virtuoso bread maker

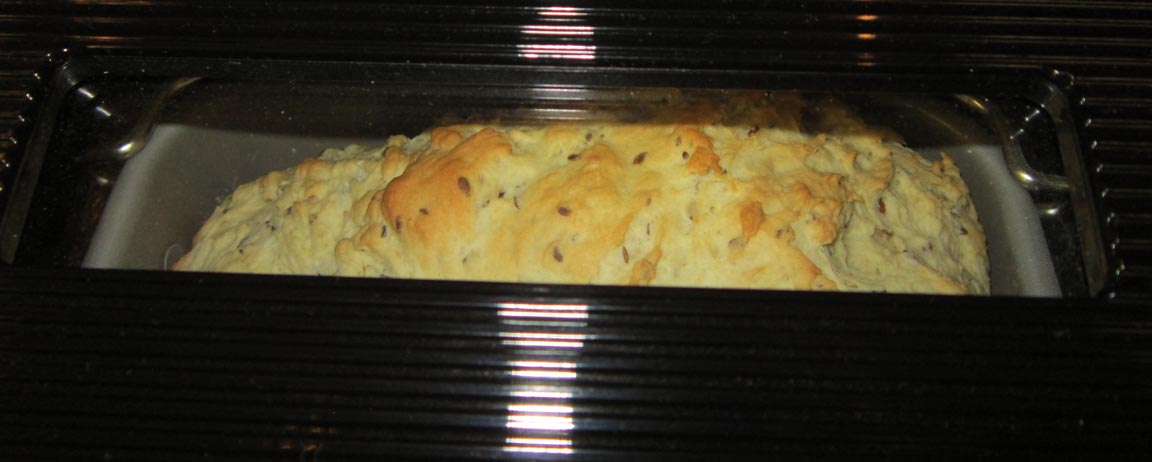
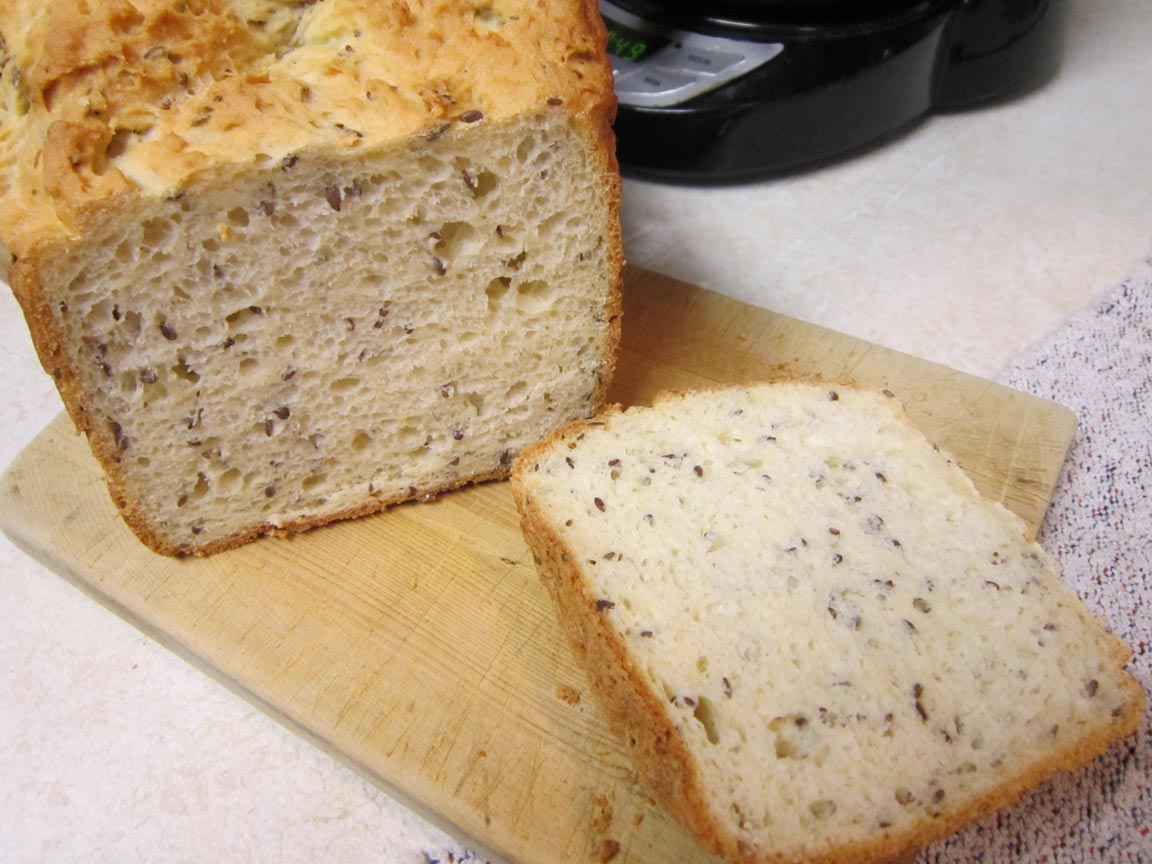
In 2-1/4 hours, you’ll have a beautiful loaf of gluten free bread like this. 🙂

gluten-free-flax-bread-on-cooling-rack

Other methods of making

Sorry, but I can’t really be of help on this right now if you have another type of bread maker or no bread machine at all. I’ll be interested to hear from you if you have suggestions, or even favorite gluten free bread recipes you’d like to share.

Zojirushi BB-PAC20 Home Bakery Virtuoso Breadmaker with Gluten Free Menu setting

gluten-free-flax-bread-d

Related Images:

Meatless Monday Tomato Spinach Feta Crustless Quiche

I tried the recipe Tomato Spinach Feta Crustless Quiche from the Bold Of Delicious blog site tonight and it turned out great. Even John thought so … It was probably a relief to him having a relatively “usual” dish rather than some of the weird stuff I have been trying lately.

Spinach Feta Crustless Quiche

Here is a link to the recipe site I used: http://www.bowlofdelicious.com/2015/01/05/crustless-spinach-tomato-and-feta-quiche/ I pretty much made the recipe as given except for a couple minor changes (always seems I make changes, lol):

  1. I didn’t have the 8 oz of feta cheese called for (I only had 6 oz because I forgot that John had used some in salad a couple nights ago), so I supplemented with 2 oz of a fresh Kefir cheese I had made last week which is very similar to feta.
  2. I substituted dried thyme for the fresh (since my plants got killed several weeks ago and I won’t be planting again until it warms up somewhat).
  3. I just used sliced Roma tomato I had on hand rather than the cherry tomato halves the recipe called for.
  4. Also, the filling was too much for the quiche pan I have, so I divided it between that and a pie plate. (2 for 1 !)

I particularly liked how light and fluffy this quiche was. I think it is because of using the feta and fresh Kefir cheeses rather than a more traditional heavier cheese like Swiss? There is plenty left for more meals. I probably would re-heat in a pan, but I understand it is also good served cold as a snack. Have you had this before?

Related Images:

Quinoa Pudding

Gluten-free and dairy-free. Healthy. Tasty. Whether you enjoy this quinoa pudding as dessert or for a nutritious breakfast, what’s not to love?

Quinoa Pudding
Quinoa Pudding

Cooking time: 35 minutes + 10 minutes rest time during which most of prep of other ingredients can be done

Yield: 6 servings. Calories per serving: 229.

Ingredients

  • 1 cup pre-washed white quinoa seed
  • 2 cups filtered water
  • 1¼ cup unsweetened apple juice
  • ½ cup jumbo golden raisins
  • ½ cup raw whole almonds
  • 1 tbsp maple syrup
  • 1 2-inch cinnamon stick
  • 1½ tsp vanilla extract
  • juice of half a lemon
  • grated rind of one lemon

Directions

  1. Add Quinoa to water in medium saucepan. Bring to boil, then simmer until  water nearly absorbed (18 – 20 minutes). Set aside covered for about 10 minutes.
  2. Toast almonds lightly in small pan to maximize flavor. Cool completely. Chop in mini food processor to medium-fine.
  3. Combine chopped almonds and remaining ingredients with the cooked quinoa.
  4. Cover and bring to boil. Reduce heat and simmer gently for about 15 minutes.
  5. Remove cinnamon stick. Scoop mixture into 6 individual dessert bowls.
  6. Cover and chill for 1 hour or more. Serve cold.

Serving Suggestions

  • Garnish with fresh pomegranate arils (seeds) for a festive holiday look.

    Quinoa Pudding garnished with pomegranate arils
    Quinoa Pudding garnished with pomegranate arils
  • Pour some almond milk (or other non-fat dairy free milk) over the top and stir for a creamier pudding consistency

Nutrition Facts for Quinoa Pudding

quinoa pudding nutrition information
Quinoa Pudding nutrition information

Related Images:

Make It Your Own

Using Ravelry projects for HeartStrings patterns as an inspirational resource

An underlying principle of my HeartStrings patterns has always been to offer “Yarn-generic patterns for creative freedom using yarns you like”.

Of course, for the sample model(s) pictured in the patterns, you might initially be swayed into envisioning the project in only that yarn. But please don’t feel locked into that — I whole-heartedly give you my permission to use something other than the specific sample yarn I show. In fact I ENCOURAGE you to make the look your own in the yarn YOU like.

Thanks to the many knitters who take the time to share their project information and information on Ravelry, you can use these as inspirational resources for ideas of making HeartStrings patterns your own, in your own way, with the yarns and colors you like, and more!

Here’s an example to demonstrate a few of the many features offered by Ravelry to help you.

Below is a snippet of an example pattern page at Ravelry. This one happens to be for the Scotch Thistle Lace Stole.

suggested yarn

Note: One way to pull up any HeartStrings pattern page at Ravelry is to go to the Jackie Erickson-Schweitzer Designs/HeartStrings FiberArts store on Ravelry at http://www.ravelry.com/stores/jackie-erickson-schweitzer-designs.

The “Suggested yarn” field is usually the yarn that was used to knit the sample model pictured in the pattern. By no means does this limit you to using only that particular yarn in the color shown though!

Click on the “yarn ideas” tab to see all the yarns used for this pattern by Ravelry members who have posted their projects.

other yarns used by Ravelry members for this pattern

Click on the “projects” tab
to see the actual projects for this pattern that Ravelry members have knitted or are knitting. Note: If you are not a Ravelry member, you might need to join (it’s free) to view other members’ projects.

Most members post pictures so you can see the colors they used and other insights to knitting the project, or how the article can be used or worn.

projects for this pattern shared by Ravelry members

If you use the Stash feature of Ravelry, the “In my stash” field even identifies possible yarns for this pattern that are in your stash!

Ravelry identifies possible yarns for this pattern that are in your stash


Ann F. wrote: “Thank you so much!  The Ravelry site gave me ideas, showing me that I have some latitude in the yarn I choose. I’m heading now into the basement to check out my cabinet of stash. ;-)”

Related Images:

Repairing a hand-knit sock with a knit-in-place patch

Counteracting a throw-away society

Considering the time and expense of making hand-knit socks, it is well worth the effort to repair them if you eventually wear through a hole. You say you don’t know how to darn a sock? Let me help with these photos and brief explanation of steps for the method I use to to repair a sock with a knit-in-place patch.

Although I usually get years of wear from my hand-knit socks, I am especially hard on the toes of socks because I have such a difficult time keeping my toenails short enough. But eventually, the inevitable happens (the pair of socks I photographed below to show are over 10 years old) and the yarn will wear thin and develop a hole.

IMG_1292

I could remove the toe area totally, and re-knit it. But I am going to show you how to darn this sock with a knit-in-place patch. This method is handy to know, because it also works well for repairing socks with wear areas in other places like the ball of the foot and heel.

Note: In the photos below, the socks from the pair I am repairing are slightly different (this is one of those self-patterning yarns that was popular in the early 90’s). I wanted to get the best photo for each major step in the process, and so sometimes the photo was of one of the socks, and sometimes the other.

Making a knit-in-place patch

1. Place a darning egg in the sock.

IMG_1294

Don’t have a fancy sock darning egg? An old-fashioned incandescent light bulb works, too. (The light bulb doesn’t even have to work any longer, so think of this as another way of using something that you might otherwise throw away, lol.)

2013-08-11 12.55.09

2. Onto a short double-point knitting needle in same size as used to knit the sock, pick up the loops of stitches in an undamaged row below the hole.

IMG_1296

Remove the darning egg temporarily.

3. Using yarn in a similar weight as the sock, knit across the row of stitches on the needle, then purl back across the row. If you happen to have some of the original yarn leftover from making the sock, all the better. But if you are like me, you won’t be able to find it after 10 years or so, lol. A yarn in a coordinating color, or even a bright contrasting color, is fine to use. The patch is likely not going to be seen when worn anyway, and if it is, a bright-colored patch could be quite fun. The important thing is that you want the yarn used for the repair patch to be a comparable weight (and of course sturdy enough so that it holds up to wear for another 10 years or so again <g>).

IMG_1257

4. Now you want to continue to knit back and forth to make a square or rectangular patch to cover the hole. At the same time, attach the patch to the original sock at the beginning and end of each knit row as follows:

k2tog the first stitch of the row with a stitch loop of the original sock 2 rows above, k until one st remains in row, ssk the last stitch of the row with a stitch loop of the original sock 2 rows above.

IMG_1259

Tip: If you have difficulty picking up the stitch loop of the original sock to incorporate into the k2tog/ssk attachment at either end, you can use a crochet hook to assist pulling the loop onto the knitting needle.

IMG_1264

5. Continue knitting back and forth on the patch until it covers and hole entirely and you have completed a purl row. Cut yarn, leaving a long enough tail to graft the stitches of the patch to the original sock.

IMG_1261

6. Insert darning egg into the sock again. This will give a good foundation for grafting the stitches and assure that you don’t catch any of the underside of the sock when sewing.

IMG_1267

7. Thread a tapestry needle with the yarn tail and begin grafting the undamaged row of stitches above the hole to the live stitches on the knitting needle.

IMG_1281Continue grafting until all live stitches have been removed from the knitting needle and are now attached to the sock.

IMG_1285

8. Remove darning egg. Bring yarn ends to inside of sock. Turn sock inside out. Insert darning egg into the sock again temporarily, and weave in yarn ends invisibly. (I always like to insert a darning egg for weaving in ends on toes of socks, so I don’t mistakenly catch the underside layer of the sock! — you probably don’t need to ask me why, lol)

The repaired sock with the completed patch

IMG_1287

I’ve already been wearing these socks for 4 months and they are holding up great. It makes me feel good about giving new life to an old friend (my socks, that is).

Related Images: