Category Archives: The Designing Day

The Mathematics of Long Tail Cast On

People sometimes ask what my favorite cast on is. Out of all the many cast on methods I know and sometimes use (and would specify in my HeartStrings patterns if I used something special), the Long Tail Cast On is my work horse – i.e. the default cast on I use unless there is a reason to use something else.

If you need a refresher about what the Long Tail Cast On is, or how it is done, here is a tutorial at KnitPicks.

Since the premise of Long Tail Cast On is to leave a yarn tail long enough to cast on all the stitches you want, a good skill to know is how much tail to leave. Especially if needing to cast on a LOT of stitches, it is quite frustrating to have to join in another length of yarn (and therefore have 2 extra yarn ends to weave in later). The other end of the spectrum is to leave way too much, and that can potentially be wasteful especially with high-priced yarn. So, like Goldilocks and the Three Bears, the “porridge that is just right” is starting out with a tail that is long enough to complete casting on all stitches plus some extra for weaving in later.

A Rule of Thumb for Standard Gauges

The relatively well-known rule of  thumb is to leave a tail that is 3 times the width of the knitting plus a few inches to secure into the knitting later by weaving in.

This works pretty well when you are knitting standard fabric gauges such as for sweaters. But can start getting off when the gauge is firmer (e.g. socks) or looser (e.g. lace shawls).

Another big consideration in socks and lace is that a supple and loose cast on is required for optimum expansion (e.g. the top of sock cuffs, or when blocking lace). So this rule of thumb might give you a too short estimate. Maybe, maybe not, but I want to offer another calculation that is almost as easy, and that at least you can consider so that maybe you won’t be frustrated by a too-short long tail after getting almost to the end of casting on a zillion stitches.

An Observation

One way that many knitters try to rectify the problem of a too-tight beginning edge is to cast on over two needles, or cast on using a larger needle. You can get by with this method, as long as the yarn used will re-distribute itself into spaces between the stitches when stretched row-wise. Otherwise, you will just get a sloppy extra-high first row of stitches, with a still too-tight cast on.

And it hardly will ever work with Long Tail Cast On, because even if the ball-end yarn loops will re-distribute and stretch out, the long tail end is already elongated along the bottom edge and constrains the widthwise stretch.

A commonly overlooked fact is that the distance between the stitches of the cast-on row is a big determinant in whether there is enough looseness in the cast on edge to stretch similarly to the rest of the knitting. Of course, you don’t want your cast on edge to be so widely spaced that it is sloppy looking either. A good test is that you should be able to fully insert a knitting needle of the same size between any two cast on stitches. If you keep this is mind, you will soon get to the point of automatically “knowing” to leave enough distance between each cast on stitch. Please don’t tell me it is impossible to use the easy work-horse Long Tail Cast On for lace — I’ve been successfully doing it or decades and want to help you learn to love it, too (if you want to).

An Easy Long Tail Calculation Based on Number of Stitches and Needle Size

Now back to knowing how much of a long tail to leave for casting on. (this of course assumes standard practice of working the long tail with your thumb for the closed edge loops of the cast on, and the ball-end of the yarn is being worked over your forefinger for the stitches that are placed on the knitting needle)

Long tail length (in inches based on mm needle size):

[ (Number of stitches) * (mm needle size) / 8 ] + some extra for weaving in later

For example, the Peek-a-Bead Scarf is 43 stitches on US 6 / 4 mm needles, so the calculation is [43 * 4 / 8] = 21.5″ + some extra for weaving in later

Note: For those using metric, convert by a factor of 2.54 cm per inch; i.e. 2.54 * 21.5 = 54.5 cm for the above example.

What’s Behind All This?

It’s that amazing thing called PI, a mathematical wonder. PI times the diameter of a needle is the circumference around which the yarn travels. So I’ve used that trajectory of the yarn’s path, simplified a bit for ease of use (but still should be plenty accurate enough), and voilà — a way you can calculate your long tail yarn length based on number of stitches and needle size.

Related Images:

Knitting for Christmas in July

Christmas in July! Goodness knows, with all this summer’s heat, day-dreaming about snow while knitting projects for winter holidays is a bit of a welcome reprieve.

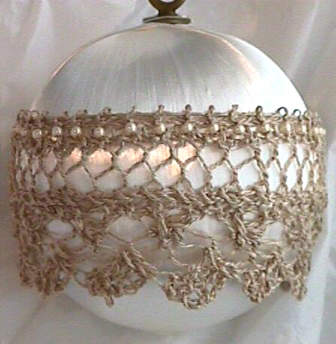
Every year at Christmas time, I say that the next year I am going to start doing my gift projects earlier. So this year I am finally doing better because there are 2000+ Bits of Lace knitting members who are keeping me at my word for this month’s project at KnitHeartStrings.com. The project is the Satin and Lace Ornament and the pattern is free when you are subscribed to the HeartStrings newsletter and you register for free content at the member website).

So if you are looking for an idea to celebrate Christmas in July, com’ on and join us.

Satin and Lace Ornament


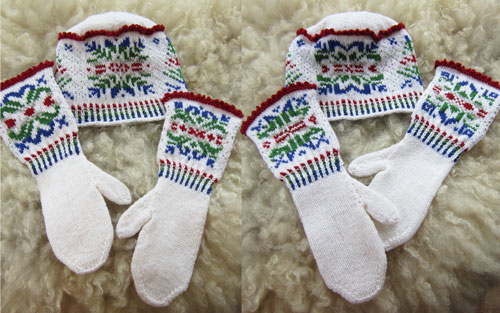
Yes, I know that you usually see me doing lace and beads. But I do like all forms of knitting. I finally got around to writing the pattern for No Two Alike Snowflakes. I had designed the original hat and mittens set in a 4-year old child size as a guild project for the Christmas tree in the Blue Room of the White House (1998).

Ever since then, I have had requests to publish the pattern for these. And (finally) I have done that and the pattern is available. If you have been waiting, thank you for your patience!

No Two Alike Snowflakes

The set features Fair Isle stranded knitting in 4 colors against a snowy solid white background. Just as real snowflakes are each different and unique, each snowflake in this set is a different design motif (and thus the name I decided on for this pattern)!

The published pattern expands the sizing to Child S thru Adult XL. I also changed the thumb on the mittens to a gusset style vs. the Latvian style of the original, as I felt a gusset is more comfortable for adult sizes (and works equally well for child sizes).  The knitting is done in-the-round with no seams to sew.

Picot trim is a fancy bind off technique used for both the tip-to-cuff mittens and the bottom-up hat. I hope you enjoy  the “secret” used to make the red picot trim at the upper edge of the hat band, even though the crown continues from there in a seamless construction.

The pictured sample models for the published pattern were knit in size adult medium using KnitPicks Wool of the Andes. The pattern is available in downloadable pdf format from HeartStrings pattern sites such as Ravelry, Shopatron, Patternfish, etc.. It is also now also available thru the KnitPicks Independent Designers listing at their website). Printed patterns will be available in shops this coming Fall.

Are you doing anything for Christmas in July? Doesn’t matter whether it is knitting or not, I’d love to hear about it.

Related Images:

Knitting Needle Wall Hanging?

How do you organize your knitting needles?

Although I love my Hiya Hiya needles (and the circular interchangeables even come in their own beautiful embroidered silk case), I have LOTS of other different needles collected over many years of knitting.

I used to keep my needles organized by size in individual zippered pencil pockets within a huge zippered binder arranged by size. When the binder got past the point of bulging and I was getting lazy about putting needles away (thus frustrating myself later with the wasted time to find what I needed for new projects), I created an organizer system from a metal merchandiser clip strip and velcro that I had on hand. The result can sort of serve as a piece of “wall art”, but I doubt it will get any awards. Anyway, it serves a purpose. And now there is room again in the binder for my other straight and double point needles. Yay!

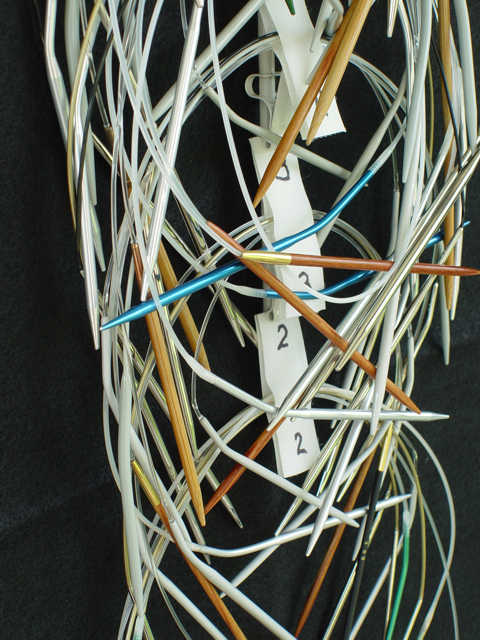
Circular Needle Organizer

For this circular needle organizer, I simply labeled the needle size with a marking pen on pieces of velcro, the needles are inserted through the layers of velcro and held by their cables, and inserted under the clip of the merchandizer strip.

The velcro holding all needles of a certain size is easy to unclip from the strip. That is handy for me because I like to try out a variety of needle compositions and lengths before making a selection to suit the particular yarn fiber and type of project I will be working on. When I have made my selection, I just re-clip the velcro strip holding the remaining needles.

Not only am I feeling more organized — the wall hanging makes quite a decorative conversation piece!

How do you organize your knitting needles and crochet hooks? Please share in your comments below or post under “This weeks question” at the HeartStrings FiberArts Facebook page.

Related Images:

Gentle Breezes from design concept to completion

I love to “paint” with color and texture in many media. Probably my favorite media and technique, not too surprisingly, are fine yarns, beads and lace knitting. The rectangular shape of a stole provides the simplest of ‘canvases’ in which to play with design.

It starts with “tell a story”. For example – Picture early morning walks on the beach and looking out over gently breaking waves through the morning haze.

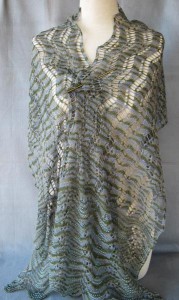
Gentle Breezes Stole

That picture-story is the basis of the design I just released at Sandrasingh.com today for Gentle Breezes. Flashback to how the story unfolded from design concept  through completion of the Gentle Breezes Stole.

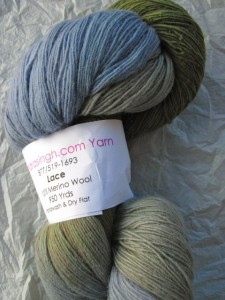
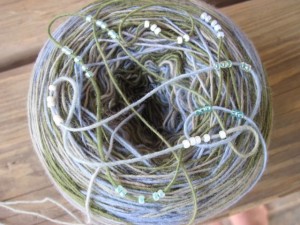
My design concepts can hibernate anywhere from a few days to several years (or maybe forever, because I still have LOTS more in the queue. No telling if I will live long enough to see the fruits of them all). Anyway, when Sandra Singh asked me to design something in her single ply Lace yarn, I found that she had a color that was a match made in heaven for the look and feel of that morning walk on the beach looking out over the ocean through a morning haze. Aptly named, the color of this gently variegated gray/blue/green yarn is Ocean Breeze.

Sandrasingh.com Lace yarn in color Ocean Breeze

I envisioned using beads to suggest the glint of sunlight off the waves. The yarn is single ply and I was concerned about the strength. So, originally I was thinking I would have to use size 6/0 seed beads, placing them using the crochet hook method on a double strand stitch loops. Fortunately, the yarn has a lot of substance and strength so that I could use the smaller size 8/0 seed beads to give the subtler look I originally was after. The strength of the yarn comes partially from it having a slight felted texture. The smaller beads will be pre-strung on the single strand of yarn and slid into place where needed as the knitting progresses.

The next step in the design process was to select a bead color. I narrow the selection to a few finalists based on bead color availability (I prefer the Miyuki brand) and my experience in selecting bead colors. I don’t think the various colors of the beads show up very well in the photo, but this is how I go about choosing the “winner” from the finalists (in this case there were 9 colors I was considering in the final running). By sliding a few of each bead color onto the yarn and seeing them against the yarn (rather than just isolated in a whole bag of beads of the same color) is more representative of what they will actually look like when incorporated into the knitted fabric.

The bead "finalists" being considered for the design

Out of the 9 bead color finalists, I decided on Turquoise Ceylon #536. Several of the others would have been lovely as well. It’s always a hard choice — I love them all!

For the knitted fabric, I planned that the ends of the stole would be worked separately and done in a wide beaded lace border reminiscent of breaking waves. Then the main area of the stole between the 2 wide border ends would be an unbeaded lace stitch pattern giving the feel of breezes and the gentle swells of the ocean.

Up to this point I had still been toying with titles for the design. I settled on “Gentle Breezes”, as I felt this gave more flexibility in knitters choosing the yarn and bead colors to match the picture story wherever they might imagine of gentle breezes on a morning or evening walk.

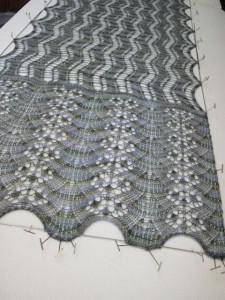
The first wide border of Breaking Waves
The 1st wide border of Breaking Waves

I found the Sandrasingh.com yarn really pleasant to work with. Even though it is a single ply, it is not kinky at all. And I’ve not had any trouble, either, in it holding up to being strung with the beads. The slightly felted texture of the yarn not only gives it strength, but a wonderful softness plus a lot of volume for its weight.

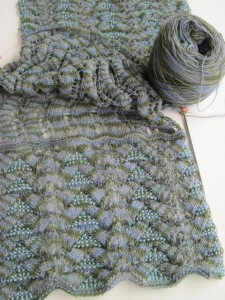
The 2nd border continues into the main area pattern

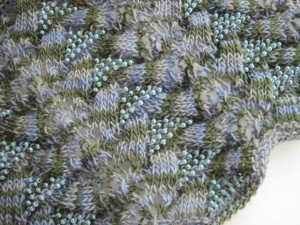
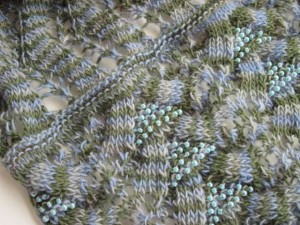
The knitting proceeded quickly. Of course, in these photos of knitting in progress, the lace knitting has not yet been blocked, so it still looks crumpled and messy. Once blocked, the design elements will “pop” and look crisper/more distinct. In this picture of knitting in progress, the 1st border (in the upper part of the picture) is just lying under the 2nd piece. The two pieces will be grafted together later for an invisible join.

Knitting in progress

After completing the knitting and grafting the 2 pieces together, the stole is tension blocked.

Blocking the stole
Blocking the stole

I never tire of that magic moment when lace is blocked out to show all of its airy beauty. The completely dried stole is then released from the blocking wires and pins, and my senses are further delighted in the wonderful drape and hand of the sheer knitted fabric.

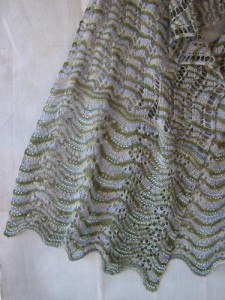
The sheer beauty and drape of the completed stole

And the story has a happy ending — or is it just the beginning? I hope you might be inspired to “paint” your own picture story using my Gentle Breezes pattern as a jumping off point in creative knitting art.

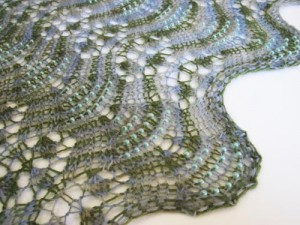
Beaded detail of "Breaking Waves"
Beaded detail of "Breaking Waves" in the border ends of the Gentle Breezes Stole


Related Images:

Thank you for helping support Womenheart

Thank you so much to those supporting WomenHeart by purchasing the HeartStrings Thinking of You Scarf pattern through Patternfish in the recent charity campaign. I wanted to let you know that almost $400 has been donated between the matching contributions of Patternfish and HeartStrings FiberArts.

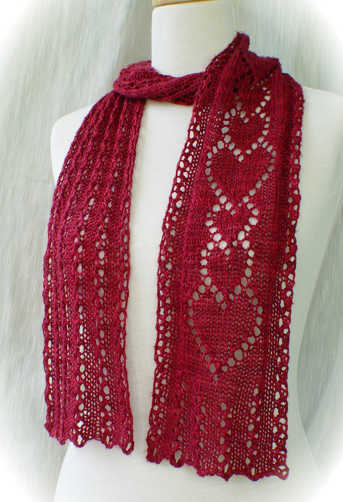
Thinking of You Scarf

There was a lot of positive response about both WomenHeart and the support that Patternfish and me were providing. I am thankful to all of you on behalf of the women who will receive crucial support services, programs, and educational materials for heart disease in women.

We even had a knitter who wanted to gift the pattern even though she already had the pattern herself. Patternfish does not yet have a Gift option set up in their system, but Gayle “the Ambassador” at Patternfish took care of the gifting manually to make it happen!

And just as important as all that, I heard from so many people who had previously purchased the pattern and were using it to “Knit Red” or gift to a friend or family member in need or comfort.

Life and our loved ones are such a precious thing.

Related Images: