Category Archives: Cooking

Is it corny to grind your own corn?

Why in the world would you want to grind your own polenta, cornmeal or corn flour? If you have ever smelled the fragrant aroma of your own freshly ground corn, then you know.

But I didn’t myself realize this until well into a recent experiment to test out the process of grinding my own corn.

John and I figured we’d just use some frozen corn kernels from the store. We figured that if the process worked out satisfactorily, then we’d be set to go next year in CO at summer’s end peak harvest season when fresh corn is plentiful and cheap. If working with fresh corn though, we’d need to add the steps of cutting the kernels from the cob and steaming (both of which have already been done for the commercially frozen, albeit more expensive option).

For the experiment, I started with 2 – 12 ounce packs of frozen corn kernels.
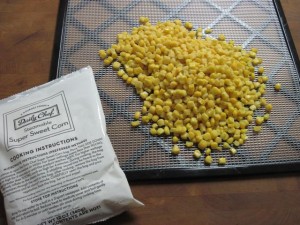
Frozen corn kernels to be dehydrated

I spread each 12 ounce bag of frozen corn on a mesh insert tray for my Excalibur dehydrator. (I use a Excalibur 3926T model with 9 trays and a 26-hour Timer.)
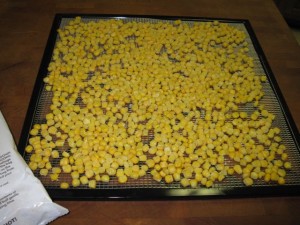
Frozen corn kernels spread on dehydrator tray

After 6 hours at 125o F, the corn is dry and shrunken somewhat as you see here.
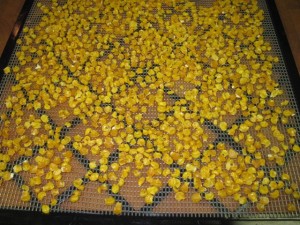
Dehydrated corn kernels

The weight loss is more dramatic at almost 75%. The original 24 ounces of corn weighs just 6.4 ounces after drying.
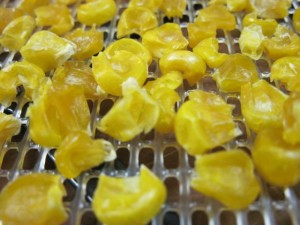
Closeup of dehydrated corn kernels

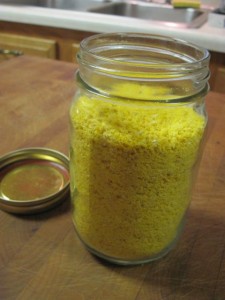
After the dehydration process, 24 ounces of frozen corn had shrunk down to filling a pint glass jar to the top.

24 ounces of dehydrated corn filled a pint jar to the top

Screw a lid on the jar to seal airtight until ready for grinding.
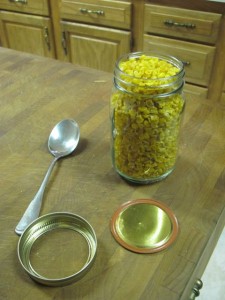
Dehydrated corn in jar ready to be sealed with screw lid

I do have a hand-crank stone mill grinder, but wanted to try my new Omega J8006 Nutrition Center Commercial Masticating Juicer, Black and Chrome. Although this experiment with the dehydrated corn has just a relatively small amount for hand grinding, my plan is that I would prefer to use my electric Omega for larger amounts.

Originally I got this Omega Juicer for juicing (well, of course!). But this workhorse machine can do so much more, such as grinding, making pasta, etc. (and I am planning to eventually put it through all its paces – so stay tuned for more of my experiments and adventures).

So in anticipation of next year’s bounty of corn at the end of the summer, I will test the Omega right now for how well it does as a grinder.
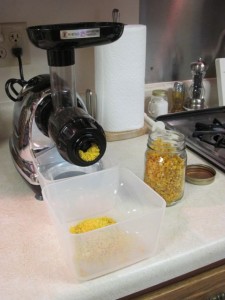
Using the Omega Juicer for grinding corn

Here is what the ground corn is looking like as it comes out of the end cap of the Omega Juicer.
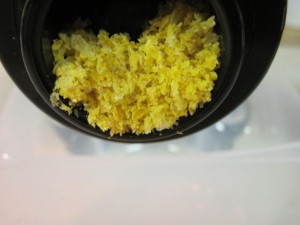
Closeup of first pass of grinding corn in the Omega Juicer

AND – here is where I was stunned by the fragrant aroma of the corn as it was being ground. If you can imagine the wonderful aroma of baking cornbread (but of course nothing is being baked — yet!) That is about the only thing I can liken it to. I wish you could have been here to enjoy it with me.

I would consider that the results of the first pass of ground corn using the Omega Juicer’s auger mechanism is suitable for polenta / corn grits. We LOVE grits, so I can see that I would definitely sometimes just want to stop at this stage without a second pass of grinding. But since this is an experiment with just a small amount, I’ll have to defer using this batch for grits.
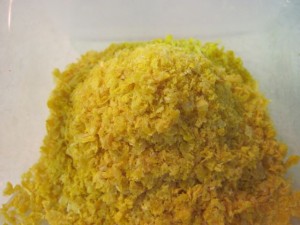
Coarsely ground corn suitable for polenta

So now I do a second pass of grinding the corn.
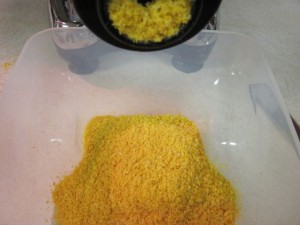
Second pass of grinding corn using the Omega Juicer

The results are a more finely ground cornmeal consistency. We LOVE cornbread, too, so I can tell we won’t have any problem using this.
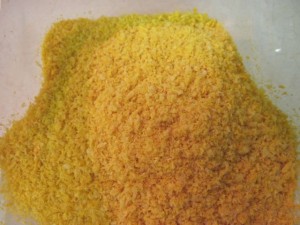
Ground cornmeal
Ground cornmeal

When the cornmeal is transferred back into the pint jar, it reaches just a bit under the normal fill level – i.e. a scant 2 cups.
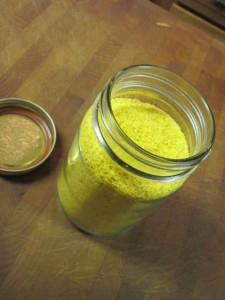
About 2 cups of ground cornmeal

Sealing the jar airtight will keep as much of the fresh, fragrant aroma as possible. But just as spices can lose their best aroma soon after being ground, I think it is probably best to only grind the amount of corn one is planning to use in the relative near-term (perhaps 1 week?). The results of this experiment shows that the volume of dehydrated whole kernels is negligibly greater than the ground volume. I can get the boon of the wonderful fragrance of the freshly ground corn in my favorite recipes without sacrificing storage space.
Seal the jar again until ready to use

So call me corny if you want. But I couldn’t be more satisfied, nor be enjoying myself so much, when doing home-y things like grinding my own corn. I hope this inspires you to try it yourself if you have not already.

Disclosure: I have included Amazon affiliate links for the Excalibur Dehydrator and Omega Juicer products I personally purchased and used in photos to go along with this blog post. If you click on a product link and purchase the item, I will receive a small commission in exchange for the sales referral. There is no obligation on your part to purchase, nor sharing of your private information.


Related Images:

Smashed Potatoes – Yumm

John asked me if I had ever had Smashed Potatoes. He had seen the idea on America’s Test Kitchen a while ago, apparently. So yesterday we picked up some freshly-harvested red potatoes to try this simple-to-make dish for our evening appetizer.

Boil until tender 6 medium size freshly-harvested (and washed, lol) red potatoes with skins on.
Drain.
Preheat oven to 450 degrees F.
Coat baking tray lightly with oil.

Whole cooked red potatoes on baking tray - before and after smashing
Whole cooked red potatoes on baking tray – before and after smashing

Set each potato on the tray and smash it with potato masher to make a free-form pancake about 1/2″ thick.

Smash the potato to make a free-form pancake about 1/2" thick
Smash the potato to make a free-form pancake about 1/2″ thick

Drizzle with garlic-olive oil and Cajun spice mix (or your choice of seasonings).

Drizzled with garlic-olive oil and sprinkled with Cajun spice mix

Bake for 30 – 40 minutes until crisp.

Baked until lots of crispy edges

Serve with dollops of sour cream.

Ready to eat!
Ready to eat!

What can I say other than deeee-li-cious. It didn’t take long for these to vanish. To me, it’s like potato pancakes with all the taste and crunch, but without the bother of a more formal preparation. Try it — I think you will like it!

Related Images:

Grilled tomatoes with cheese, prosciutto, and basil

Here’s a simple and quick summer meal. You’ll need:

  • fresh tomatoes
  • seasoning mix
  • fresh basil
  • cheese
  • prosciutto
  • oven tray
  • aluminum foil
  • broiler

For the tomatoes and basil, I enjoyed the bounty from my garden. Or shop your local fresh market.

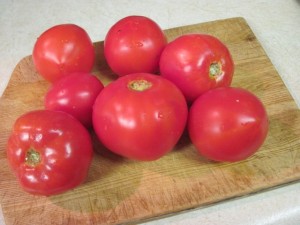
Fresh tomatoes from my garden

 Wash the tomatoes, remove stem area and cut in half. Wash some fresh basil, pat dry, remove leaves from stem and chop them coarsely.

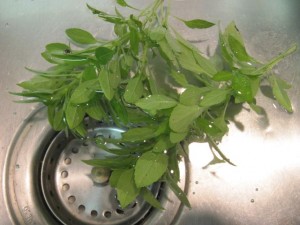
Wash some fresh basil
Wash some fresh basil (I used cinnamon basil)

Place tomato halves in a single layer on an oven broiler or cookie tray (lined with aluminum foil for easy clean-up). Lightly season as desired (I used Zatarain’s Creole Seasoning). Sprinkle with chopped basil leaves.

Halved tomatoes sprinkled with seasoning and chopped basil

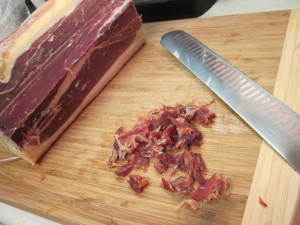
Slice some prosciutto very thinly and chop it into small pieces.

Thinly slice and chop some prosciutto

Place a piece of cheese on top of each tomato. (I used Emmentaler swiss cheese.) Then a bit of the chopped prosciutto on top of the cheese.

Top with cheese and prosciutto

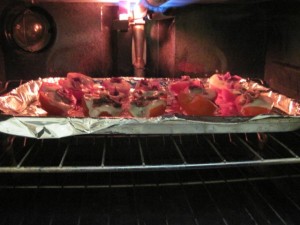
Place tray under heated broiler. Grill until cheese starts to turn golden and prosciutto crisps. This should go relatively quickly so that the topping is cooked, yet leaving the tomatoes still rather firm rather than mushy.

Grill under broiler
Grill under broiler


It’s smelling good, looks good …

Grilled tomatoes
Grilled tomatoes

… and tastes good, too. I guess you’ll just have to either trust me on that last part, or try this out for yourself. Enjoy!

Related Images:

Savory Sage for Taste, Sight, Smell

With the addition of herbs and spices to meatless dishes, you’ll hardly miss the meat. Especially if you are using the freshest ingredients. And what can be more gratifying than growing your own? Today I am going to feature Sage, because as you can see here, it is happily blooming away in my garden. Isn’t it pretty?

Sage in bloom
Sage in bloom

Not only is Sage a tasteful addition to your cooking repertoire, but it makes beautiful, fragrant bouquets. Or dry some of your garden-harvest sage leaves and flowers for your next batch of homemade potpourri.

There are SO many ways to use Sage in your cooking, in your decor, and even for personal health and hygiene. According to Wikipedia, Salvia officials is the official botanical name of common garden sage. Both  Salvia and Sage come from the Latin salvere (to save). That’s really close to the word savory, too, which is definitely a wonderful, tasty attribute that sage lends to so many dishes.

Sage is probably most often thought of in its dried variety for use in stuffings and sausage. But you can fool your taste buds into the satisfaction of those meat dishes without the meat. Try a bit of sage in your next vegetable dish. But don’t overdo it. A little goes a long ways. It balances out well with other herbs like basil, rosemary, thyme, oregano and mint, too.

Fortunately, when you grow sage yourself, you can take advantage of the many ways to use sage in its fresh stage. I love the smell of the fresh leaves. Try them as an aromatic garnish for salads. Did you know that the flowers are edible as well as beautiful?

Sage flowers are both beautiful and edible

You can even toss the stems or leaves onto the hot charcoal of your grill; it will add a wonderful aroma to your grilled veggies (or meat if you can’t bring yourself to go meatless).

Speaking of potpourri and sage in bloom, here is a little lace-edged sachet pouch that we are knitting over at the Bits of Lace knit-along this month. This would also make wonderful gifts for the important “Mom’s” in your life on Mother’s Day.

Three Eyelets Sachet

The pattern is available to Bits of Lace members through April 27, 2012. So get on over to KnitHeartStrings.com now and register for your free membership in Bits of Lace 2012 if you have not already done so. And remember to grab the pattern from the Free Membership Pattern area before it is taken down from the free area to make room for the next pattern.

Related Images:

Sunday Brunch Egg in a Hole Grits Style

Whatcha cookin’ for Sunday brunch? With the change for daylight savings time, I am already an hour behind on my usual get-into-the-day schedule. So today I’m serving up something really easy for you.

I call it Egg in a Hole Grits Style. It’s just a take-off on the simple Egg-in-the-hole recipe that substitutes a ring of grits for the usual slice of toast with a cut-out circle in the center.

I do LOVE home-cooked grits. The kind that takes 20 minutes to cook; i.e. not that mushy instant variety. Take some of your cooked grits and spoon  into a hot buttered small frying pan in the shape of a ring. I think it’s best to use a shallow frying pan so that it’s easy to slide the finished concoction a plate.

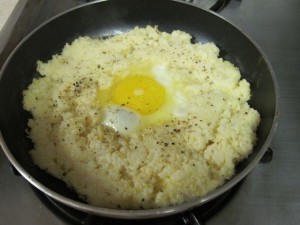
Use a ring of grits rather than a slice of toast with a hole cut out

Let the grits “fry” until becoming a bit browned and bubbly on the underside. Then crack an egg into hole and cook until of desired doneness. Personally, I like a runny yolk because I can mix in some of that yummy goodness with the grits later when I am eating. Slide the finished concoction onto a serving plate while preserving the look and shape (unless you just want to serve it in the pan!).

Which reminds me of one of my favorite movies My Cousin Vinny.  I swear that my friend John knows every line of that movie. The one we like most to cite is where Vinny challenges the testimony of the self-respecting Southerner witness who would never cook instant grits by asking him: “how could it take you 5 minutes to cook your grits when it takes the entire grit eating world 20 minutes?” 🙂

Related Images: