Category Archives: Cooking

Jackie-O-Lantern Tortilla Pizza Pie

Looking for a fun and quick fixin’ treat for Halloween? Join me in making pizza with yummy edible jack-o-lantern details.

Have you always dreamed of carving the ‘perfect’ pumpkin? As a kid, I found that harder to do than I thought it would be. Before I even had a chance to approach being an ‘expert’, I moved to Cajun country in the deep south. Believe me, carved pumpkins don’t last long around here in the heat that persists well past Halloween! They wither up quickly and get pretty gross (rotted pumpkin smell is yuck!)

So I’ve come up with some other ways to practice my talents in making jack-o-lanterns. Join me in making a Jackie-O-Lantern Tortilla Pizza Pie.

Slice a piece of Jackie-O-Lantern Tortilla Pizza Pie

INGREDIENTS

  • Plate-sized flour tortilla (i.e. soft taco wrap)
  • Salsa
  • Cheddar cheese
  • Fresh Jalapeno or sweet green pepper (your choice, depending on your taste preferences and availability)
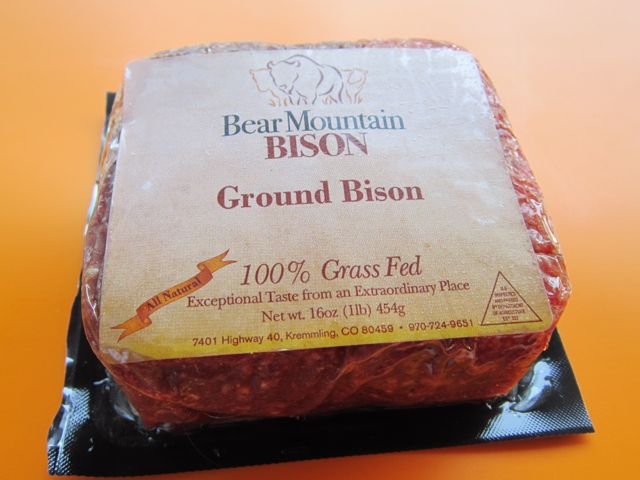
  • Cajun smoked sausage (andouille) or other meat topping that can be ‘carved’ for the facial features (e.g. pepperoni or slice salami)
  • Optional: Red hot sauce

INSTRUCTIONS

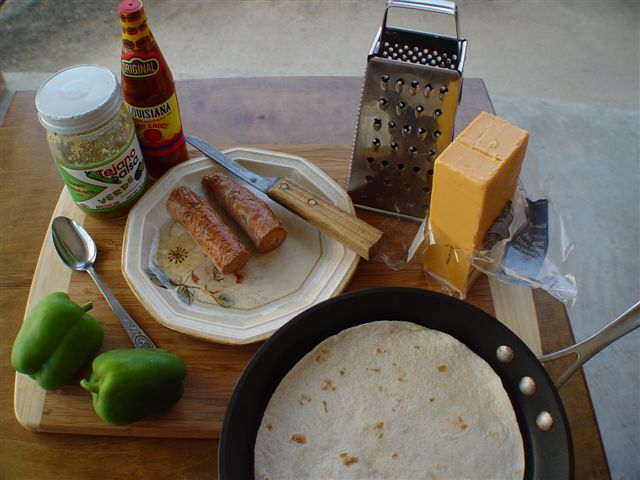
Get all the ingredients and cooking tools gathered together and then you are ready to get started on assembly.

Ingredients and cooking tools for Jackie-O-Lantern Tortilla Pizza Pie

Assembly

STEP 1 – Put flour tortilla in pan.

Note that I am planning to use a stove-top non-stick sauté pan for ‘baking’ the pizza.

STEP 2 – Spread some salsa on the tortilla.

I prefer green salsa, but red salsa is good, too. My taste buds have gotten used to hot and spicy here in Cajun country, so the hotter the better.

STEP 3 – Grate cheese and sprinkle amount desired over salsa.

I prefer extra-sharp cheddar, but ya’ know, any cheese is good. I haven’t ever met a real cheese that I didn’t like. I don’t recommend those imitation processed cheeses though.

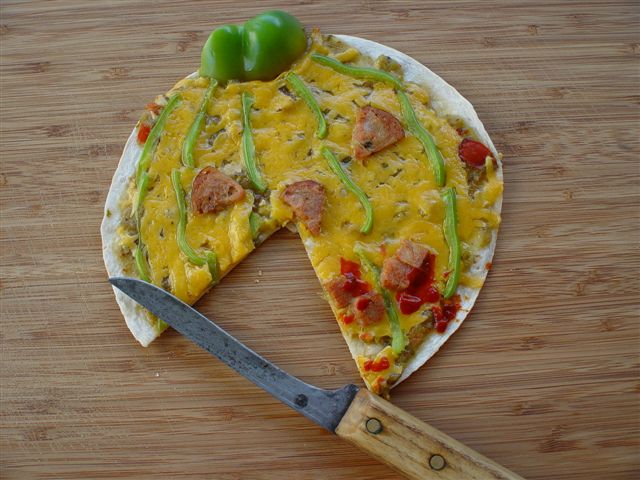
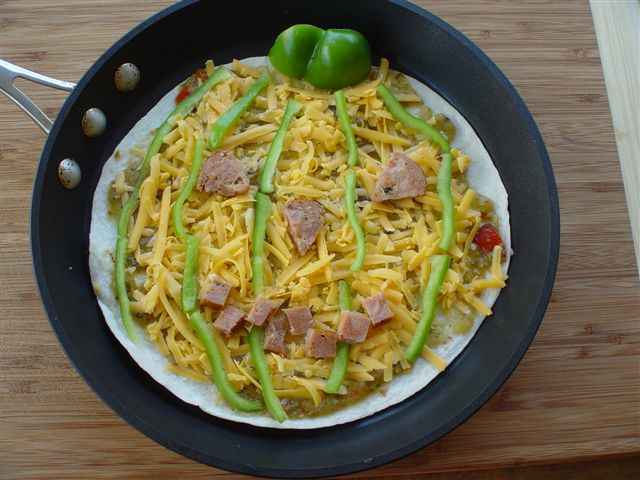
STEP 4 – Clean and slice pepper in thin strips, reserving top of one half as the ‘stem’ of the pumpkin. Place strips and stem as shown in picture to mimic a pumpkin.

Did you see those sweet green peppers in the picture? Those are from my own plants, still producing peppers in bunches like grapes even now this late in the season!

STEP 5 – Slice sausage and ‘carve’ triangle and small rectangle pieces for eyes, nose and teeth. Place similarly to that shown in picture as a guide, or just be creative with your own facial features and expressions!

Assembled Halloween tortilla pizza

Baking

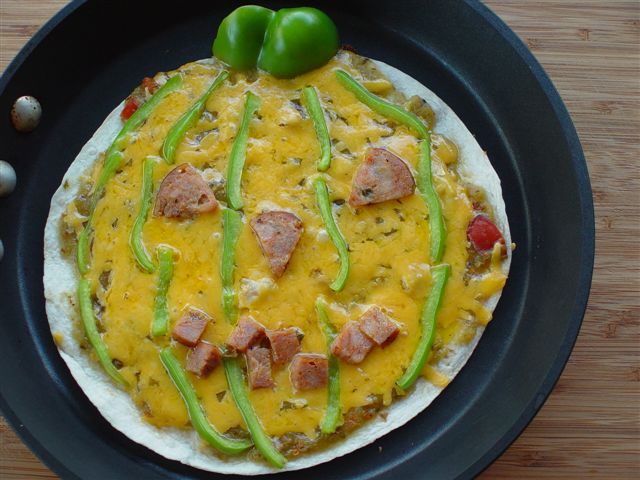
Cook on stove over medium heat for 7 – 8 minutes, or until cheese is melted well and bottom of tortilla is crispy.

Did I mention it stays hot where I live well past Halloween? Well, no use heating up the house by turning on the oven, and stove-top will work just fine.

Here is the ‘baked’ pizza. Isn’t it cute?

Baked Halloween Pizza

Serving

To amuse the kids (or even grown-ups!), shake some red hot sauce ‘blood’ over the mouth. (or substitute catsup if you don’t like it as spicy as we do here in Cajun country)

Slice in wedges and eat it up ’til gone. 🙂 Let me know how you like it.

Slice a piece of Jackie-O-Lantern Tortilla Pizza Pie

Have fun and bon appetit!

Related Images:

John’s Triple Chocolate Rummy Cake – yummy chocolate decadence

chocolate decadence for the holidays

John is a terrific cook, although seldom makes desserts (which is good for both of us since otherwise they are just too tempting, lol).  The holidays do deserve  special treats, though. So he always looks for an opportunity to make this Triple Chocolate Rummy Cake to take to holiday parties where we can share the calories and yumminess. John shares his decadent recipe here —

Ingredients

1 box devils food cake mix

1 – 3.9 oz box instant chocolate pudding mix

4 large or xl eggs

1 tsp instant coffee

1 C sour cream

1 stick of unsalted butter (melted)

2 Tbsp Hershey chocolate syrup

12  oz pack of semisweet chocolate chips

1 tsp real vanilla extract

1/4 tsp real almond extract

1/2 C (or a touch more – it’s the holidays after all!) Myers dark rum

Process

Mix all ingredients except cake mix, pudding mix and chips in a bowl until well blended.

Mix pudding and cake mixes in a larger separate bowl and stir to combine.

Pour the wet mixture into the dry and mix until just combined.

Fold in chips.

Put the batter in a well greased (I use basic cooking spray) baking dish or other container for cooking.

Heat oven to 275 degrees and cook for 80-90 minutes but check it with a tooth pick after about an hour.  When pick comes out clean it is done.

Once it cools for 15-20 minutes remove carefully to a cooling rack.

John's Triple Chocolate Rummy Cake

p.s. Have you seen John’s recipe for Bison Burgers?

Related Images:

Bison Burger Recipe

John made bison burgers last night. They are so good. I promised him that I would post his recipe on the blog if he would write up the recipe (which he has). He is teasing me now that I can’t eat or knit until I get the blog post done, lol. Of course, he doesn’t really mean it — just his way of nudging me out of my procrastination. 🙂

Have you ever eaten bison (buffalo) meat? I am not much into eating meat, but I really am surprised how much I like these bison burgers that John makes. So let us share it here with you. I hope you give it a try!

ground bison 100% grass fed

INGREDIENTS

1 pound of grass fed ground bison(we got ours from Sprouts Farmers Market)

1 1/4 tsp kosher or sea salt

1 tsp ground pepper

1/4 to 1/3 C of Panko bread crumbs

1/2 medium yellow onion finely chopped

2 cloves garlic minced

1 tsp dried sage and 1/2 tsp Mexican oregano (crushed in a mortar or spice grinder)

2 tbsp olive oil

PREPARATION

Thaw bison to room temperature.

Saute onion and garlic in the olive oil until cooked and starting to brown. Then set aside to cool.

saute onions and garlic for Bison Burgers

Add 1/2 tsp of water to ground sage and oregano mix to rehydrate.

the rest of the assembled ingredients for Bison Burgers

Lightly fold ingredients into the bison but do not kneed much or it will get tough.

mix ingredients for Bison Burgers

Form into four 1/4 lb or three 1/3 lb patties about 1/2″ thick and make a shallow depression in the middle of each.

form patties for Bison Burgers

Preheat a pan (cast iron is best) at medium heat and cook for 6 – 6 1/2 minutes per side or less if you want the burgers medium or med-rare.

Let the cooked burgers rest for 5 minutes before serving.

Note: cheese may be added in the last 3-4 minutes of cooking if desired.

Bison Burgers with cheese

Enjoy! John and Jackie

Related Images:

Dried Kumquats

The little kumquat tree I started in my front yard a couple of years ago was loaded with fruit this year. It wasn’t actually a lot of fruit, but for the small size of the tree, I am very pleased with its production.

So far I’ve made a couple of small jars of kumquat preserves and also sliced some fresh kumquats to put in garden salad. Now I am looking for something else to do that will help me enjoy the wonderful, citrus flavor of these fruits throughout the year. The answer, of course, is to dry them! Here is a photo journal of my process using the Excalibur dehydrator I got just last fall and am already finding many, many uses for. (I will tell you more about these in future posts)

Wash kumquats and trim ends if necessary.

Cut kumquats in half.

Remove seeds/pulp center from the peel. The easiest and fastest way I’ve found to do this is just to press my thumbs against the outside of the halved kumquat, thus inverting the peel and pushing out the pulp center along with the seeds.

Place the peels on dehyrator tray. I like to put them peel side down so that the juicy bits do not get the tray unnecessarily sticky. That way there is less tray cleanup, while still getting maximum air flow through the tray grid during the dehydration process.

Here are the kumquat peels after 6 hours in the dehydrator at 135 degrees F.

The kumquat skins will have shrunk up and look a bit wrinkly.

They are crunchy with a nicely intense flavor. Yumm.

Store dried kumquats in an airtight zipper bag that has been labeled and dated. No need to refrigerate — these will last just like they are on the shelf for months and months — IF  I don’t eat them all before then, lol.

Related Images:

Playing in the Kitchen: Making Fresh Pasta

Pasta is just about my favorite food group, lol. So I’ve been wondering just how much better it might be if I made it myself.

Actually, I had planned to try making homemade pasta many years ago. I even got an Atlas pasta machine like my friend Dawn Brocco shows in her blog article here. But then I decided to use the Atlas pasta machine for clay crafting (especially buttons to go with hand-knitted sweaters). Obviously, once I had used the pasta machine for non-food, I was never going to chance using it for food prep.

Recently I purchased an Omega Juicer with of course, the idea of using it for a juicer. It’s GREAT at juicing. But I also read that it could be used for extruding pasta. So I decided to try it out for making some pasta. There are several nozzles available that come with the Omega. The one I decided to play with is for thin, round spaghetti.

Setting up to make fresh pasta.

Preparing the Pasta Dough

I used a Cuisinart Pro Classic Food Processor fitted with the plastic blade to speed up the kneading process (and also to save my hands for knitting, ha! ha!). But of course you could also hand-mix and knead the dough.

1. Bring the following ingredients to room temperature before beginning:

300 g semolina flour
1 tsp salt
3 large eggs beaten

2. In the food processor, pulse the flour and salt a couple of times to mix these ingredients well.

3. While the processor is running, dribble the whipped eggs through the feed tube a little at a time until all has been added.

4. Continue processing until the ingredients form a smooth ball of elastic dough.

5. Set out the dough on a work surface lightly dusted with all purpose flour. Knead a few times by hand again just to feel like you are working so hard at this, ha! ha!

6. Shape the dough into a ball and put it in a covered bowl. Leave to dough to rest for 15 – 20 minutes while setting up the work area for extruding the pasta and taking a break to take a few sips of wine.

Sorry, no photos of the steps for the dough itself.  I completely forgot about that while listening to the food processor chug away (it did get quite noisy as the dough came together).

Extruding the Spaghetti Pasta

And no photos of the actually extruding the dough with the Omega (that goes so fast that one could use more hands, lol). I promise that next time I do this, I will try to get pictures.

I handled only about 1/4 of the dough at a time as you don’t want it to dry out. Even a 1/4 of that ball of dough makes a lot of spaghetti.

I set up a clean kitchen towel lightly dusted with all purpose flour under the nozzle of the Omega. I also filled a large-holed shaker with some more all purpose flour.  Using one hand, I  pushed the dough down with the plunger into the feed tube of the Omega while dusting the spaghetti coming out of the nozzle. The nozzle has 4 holes; it is important to dust well enough so that the strands of spaghetti do not stick together at this stage. This goes REALLY fast and before the strands get too long, turn machine off and cut the strands off at the nozzle. Then separate the strands and hang on a rack to dry.

The spaghetti hanging on a towel-covered rack to dry.

Drying the Spaghetti Pasta

That rack I used is just one of those cheap clothes-drying racks. The towels are cotton I hand-wove in the Acadian style thanks to a workshop from Norman Kennedy a number of years ago. Love those towels, and they look nice with the pasta too, don’t you think? It could almost be fiber art!

The spaghetti is a little messy looking, but toward the end I was getting better with the process. Next time should be easier.  I also imagine that if I had started out with one of the nozzles with thicker holes (e.g. fettucini), it might not have been quite as tedious.

I left the spaghetti to dry over night and then removed it from the rack. I was so anxious to see how it tasted that I didn’t even bother to put it into a storage container. Next step is straight to the cooking pot.

The dried, fresh spaghetti pasta

Cooking the Spaghetti

Be prepared that fresh pasta is going to cook in a fraction of the time of commercial off-the-shelf pasta. You actually don’t even really have to taste-test it to know … you can see its “doneness” when it is floating on top of the water and sort of puffs up and gets a bit translucent. Perfect al dente.

Cooking the pasta
Cooking the pasta

Drain the spaghetti and its ready to eat. At this stage, I guess it doesn’t really look a whole lot different than regular store-bought spaghetti. But we know differently, don’t we?

The cooked spaghetti

Eat and Enjoy

Meantime, John had been making a meat sauce ragu to serve with the spaghetti.  I wasn’t really watching closely, so don’t ask me too much about it. I just know that between the fresh pasta and the meat sauce, I think this is the yummiest spaghetti I have ever had.

Fresh spaghetti with homemade meat sauce and freshly grated parmesan

We both agreed that the fresh spaghetti pasta was a success. Maybe more work than we are willing to routinely do. But its definitely worth the trouble for a special treat. I would make spaghetti again. And want to try making fettucini sometime, too.

Do you have some experience with making pasta you would like to share? I could certainly use tips now that I am hyped for making more fresh pasta.

p.s. I also wrote about using the Omega Juicer in Is It Corny to Grind Your Own Corn. I’m certainly getting a lot more use out of this Omega Juicer than just juicing!

Related Images: